
Use the Gurucan integration to give customers access to Gurucan courses and offers when they buy a product. You can also remove access to courses, for example when a customer asks for a refund.
Gurucan is available in PublishPress Cart Pro.
Before you start #
You need:
- A Gurucan school.
- A Gurucan API key.
- At least one course or offer in Gurucan.
Step 1: Get your Gurucan API key #
- Log in to Gurucan.
- Go to Online School Settings → Integrations.
- Select JSON:API.
- Copy the API key.
Step 2: Connect Gurucan to Cart #
- In WordPress, go to Cart → Settings → Integrations.
- On the Gurucan card, click Configure.
- In School URL, enter the URL of your school, for example
https://your-domain.gurucan.com. Do not put a slash at the end. - In API Key, paste the API key.
- Click Save changes.
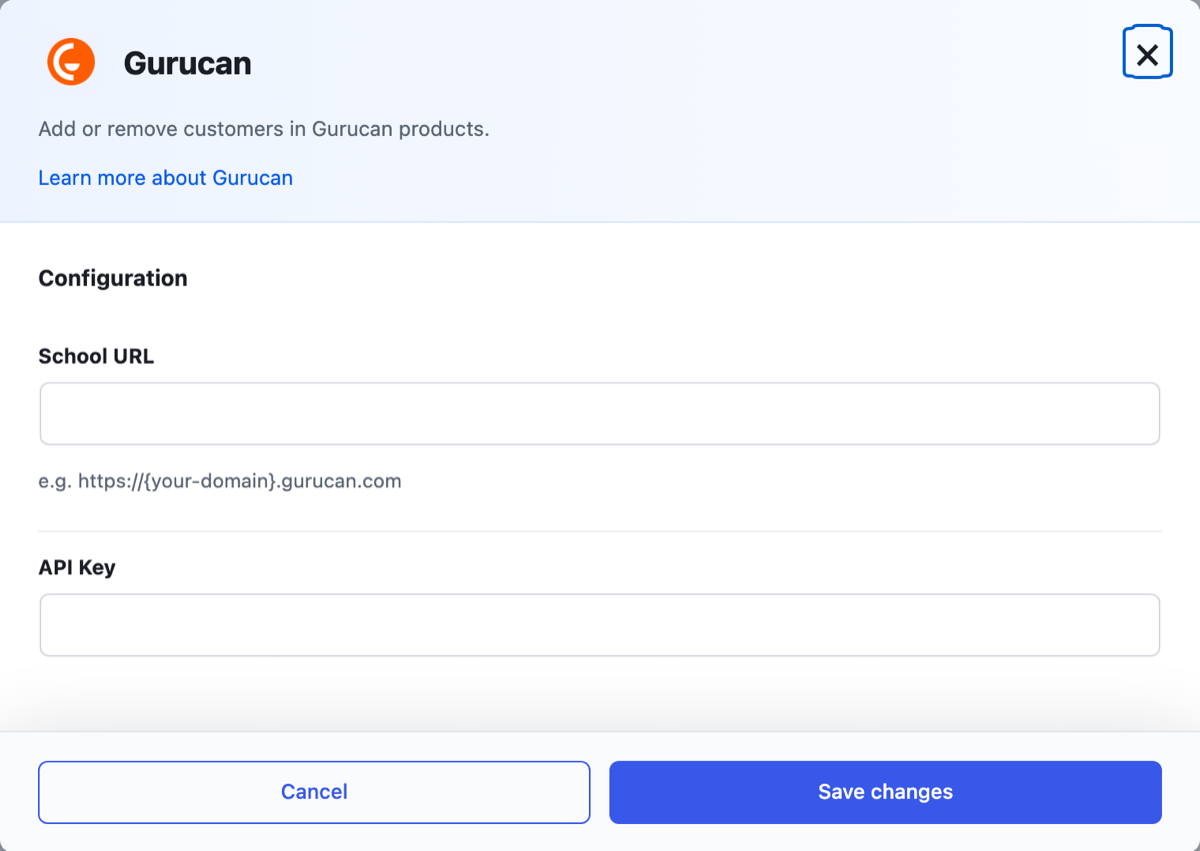
Gurucan shows in the product Service list after you save the API Key. Cart also needs the School URL to connect to your school.
Step 3: Add the integration to a product #
- Go to Cart → Products and open a product.
- Open the Integrations tab.
- Click + Add integration.
- In Service, select Gurucan.
- In Trigger, select the event that runs the integration, for example Product purchased.
- In Action, select Grant Access or Remove Access.
- In Course(s), select the courses that Cart gives or removes.
- In Offer(s), select the offers that Cart gives. For Remove Access, leave this field empty (see below).
- Click Publish or Update.
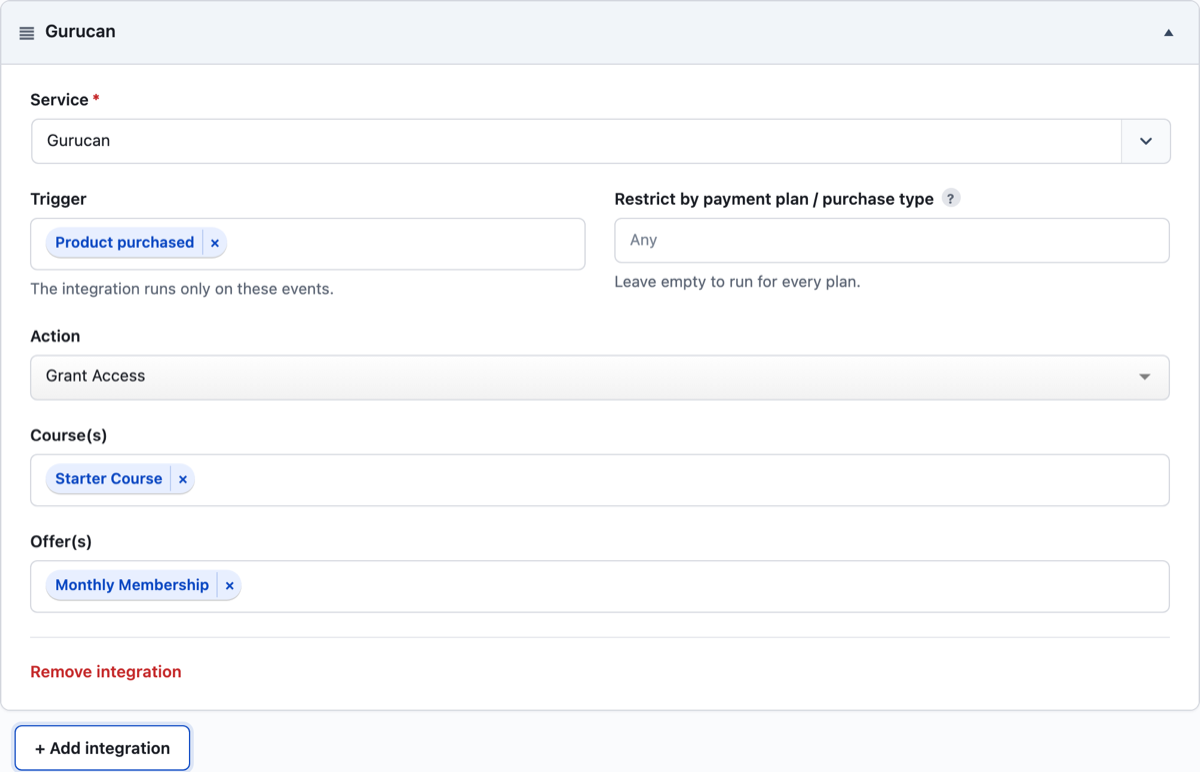
For the full list of triggers and the Restrict by payment plan / purchase type field, see Integrations Overview.
Cart loads your courses and offers from Gurucan when it shows the product Integrations tab. If you add a course in Gurucan, reload the product page to see it.
What Cart does in Gurucan #
Find or create the Gurucan user #
For each action, Cart first searches Gurucan for a user with the customer email.
- If Cart finds the user, Cart uses this user. The order notes show “Existing Gurucan user found”.
- If Cart does not find the user, Cart creates a Gurucan user with the customer email and full name. If this fails, the order notes show “Fail to create Gurucan user”.
Cart does this step for Remove Access too. If the customer has no Gurucan user, Cart creates one.
Grant Access #
Cart gives the user access to each selected course and each selected offer. Cart sends one request to Gurucan for each item.
When all requests succeed, the order notes show “Access is granted to gurucan user.”
Remove Access #
Cart reads the list of courses and offers that the user has in Gurucan. Cart takes the selected courses out of this list. Then Cart saves the new list in Gurucan.
When the update succeeds, the order notes show “Access is revoked to gurucan user.”
Use Remove Access with courses only. Leave Offer(s) empty. If you select offers, Cart can remove the wrong offers from the customer.
Courses or offers do not show #
- Go to Cart → Settings → Integrations and open the Gurucan card.
- Check that School URL and API Key are correct.
- Reload the product page.
The order notes show an error #
Open the order in Cart → Orders and read the Order Notes box.
- “Fail to create Gurucan user” Cart could not create the user in Gurucan. Check your School URL and API Key.
- “Grant Access failed” Gurucan did not accept a grant request. When more than one item fails, the text repeats once for each item, with commas between.
- “Revoke Access failed” Gurucan did not accept the update of the user.
Check that it works #
- Buy the product with a test email address.
- Open the order in Cart → Orders. The Order Notes box shows “Access is granted to gurucan user.”
- In Gurucan, find the test user and check the courses and offers.