
A large number of WordPress users have sites with custom post types. Sometimes this is done using custom code. Sometimes it’s done with a theme. Sometimes it’s done with a plugin.
However, although these methods can provide many features, they rarely deal with permissions.
By default, nearly all custom post types will inherit the same permissions as Posts. So a user in the “Editor” will role will automatically be able to write and edit in your custom post type.
In this guide, I’ll show you how to add permissions to your custom post types with PublishPress Capabilities.
This guide will show you how to create permissions for your whole post type. If you need more granular permissions, check out this guide to using PublishPress Permissions Pro.
Adding Permissions to the Post Type #
- Make sure you have PublishPress Capabilities installed.
- Go to “Capabilities” in your WordPress admin area
- In the top-left corner of the screen, load the user role that you want to customize.
- In the right sidebar, and check your custom post type under “Unique Capabilities for Post Types”. Doing this will allow you to control the permissions for your custom post type.
- Click “Update”.
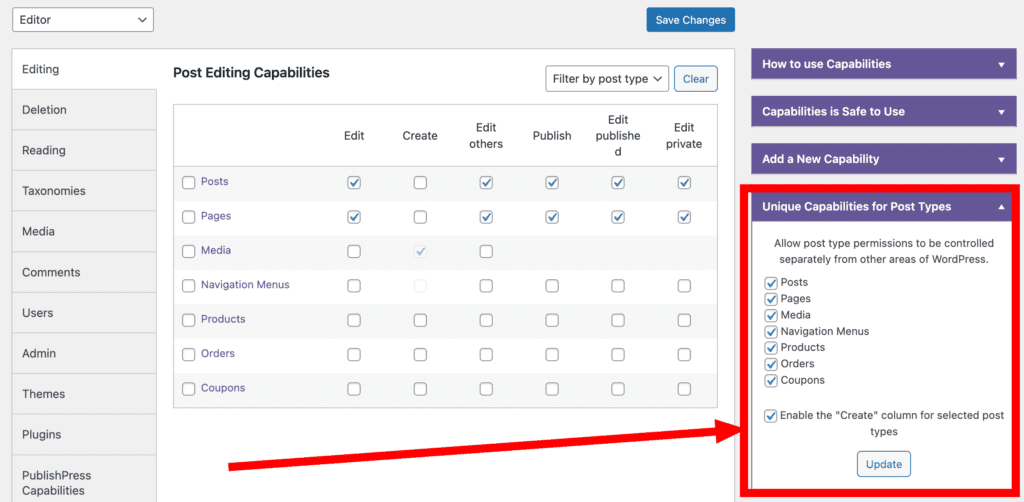
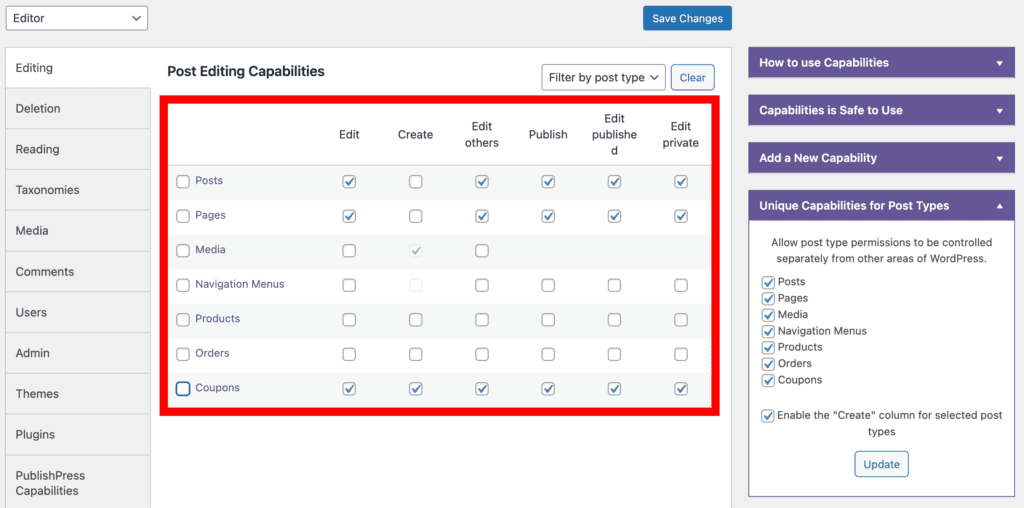
Look in the center of the screen and you can now see custom permissions for your new post type. You can control editing, deletion and reading capabilities for your post type:
Why Does This Not Work for My Post Type? #
This approach may not work with all post types. One common problem is that your custom post type does need the “public” property set to “true”. Here’s an example of that “public” property in the function used to create a post type:
$args = array(
    'labels'        => $labels,
    'description'   => 'Holds our products and product specific data',
    'public'        => true,
    'menu_position' => 5,
    'supports'      => array( 'title', 'editor', 'thumbnail', ),
    'has_archive'   => true,
  );