
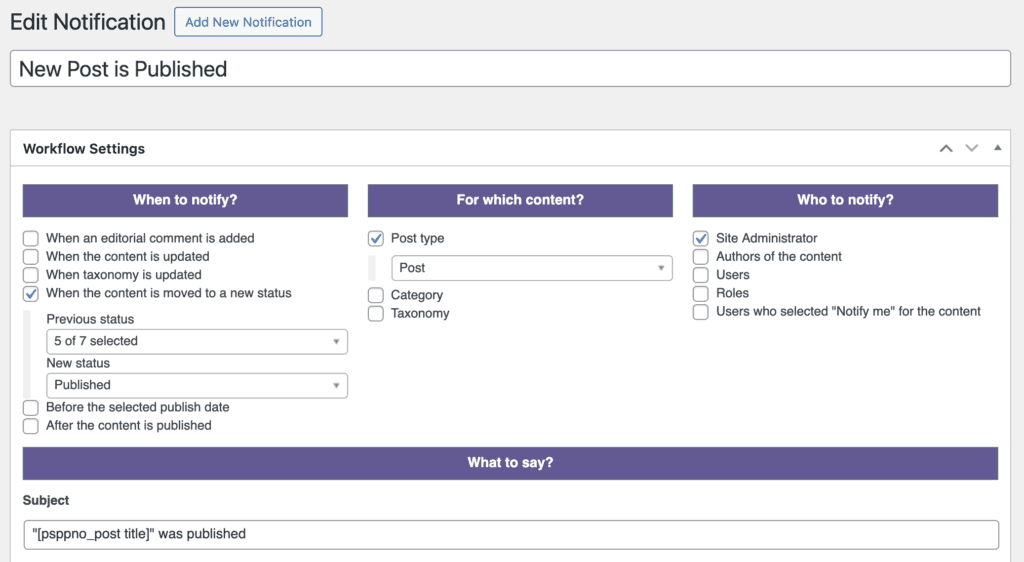
This image below shows the main screen for notifications in PublishPress Planner. Scroll down for an explanation of each area of the screen:
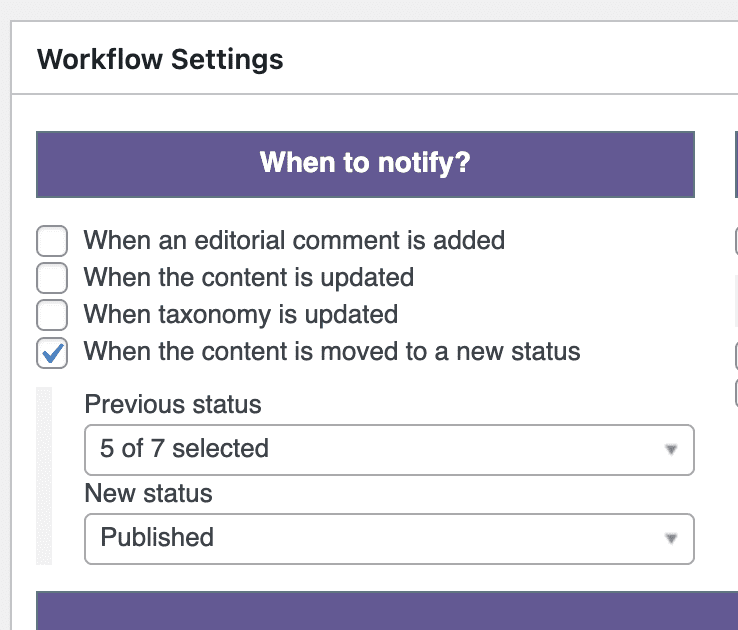
When to notify? #
This area allows you to choose how the notification is triggered. For example, in the following image, notifications will be sent when content is moved one of five statuses to the “Published” status.
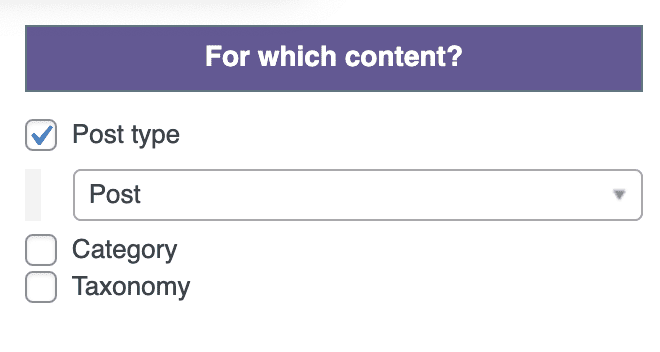
Filter the content? #
This area allows you to choose which content will trigger the notifications. In this next image, notifications will be triggered only for content in the “Post” type.
Who to notify? #
This image shows the area of the screen where you select which users received notifications:
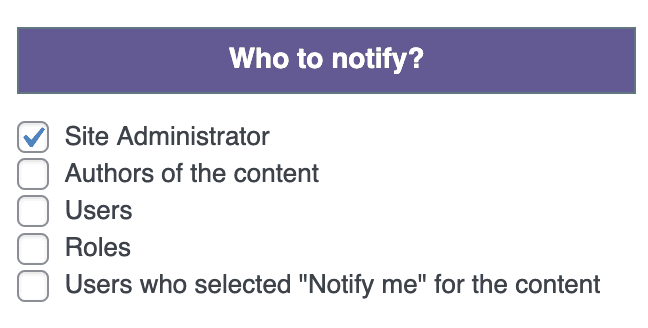
Here are explanations for these options:
- Site Administrator: This is not an individual user. This refers to the email address entered in the “General Settings” area of WordPress. Because this is an email address, the notifications are always sent by email.
- Authors of the content: Notifies the users who are set as the authors of the content.
- Users: You can select multiple users, searching for them by name or filtering only the selected ones.
- Roles: You can select multiple WordPress user roles. These can be customized using the “Roles” feature in PublishPress Planner.
- Users who selected “Notify me” for the content: Click here to read about this feature.
What To Say? #
This area allows you to control the content of the notifications. The content sent in the notifications can easily be customized. The notifications support HTML for email and plain-text for Slack notifications.
You can add dynamic information to the Subject or Body text using shortcodes following the format explained in this documentation article.
Where To Notify? #
Each user can decide where to receive the notification, or they can mute the notification. By default, the notifications are sent by email. But you can extend that using add-ons like Slack for PublishPress Planner.
These options can be configured in the user’s profile:
