
This feature requires the Pro version of the PublishPress Authors plugin.
This guide shows how to add a new field using PublishPress Authors Pro.
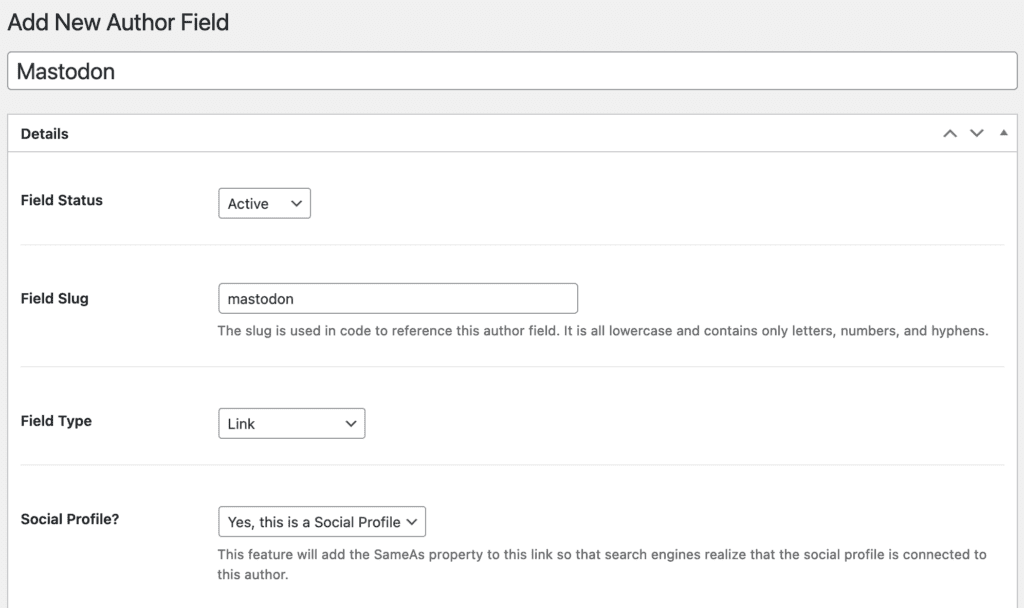
We will show you how to add new social link to author profiles. This example we’ll use is a field for the “Mastodon” social network.
To get started, we’re going to add some new social icons to PublishPress Authors.
- Go to Authors > Settings > Advanced.
- Check the “Font Awesome icons” box. This will load Font Awesome icons for use in Author Boxes.
Now we can add our new social field:
- Go to “Authors” then “Author Fields” in your WordPress admin menu.
- Click “New Author Field”.
- Create your new field for social links. In the image below, I’m using the “Link” field type and selecting “Yes, this is a Social Profile”.
- Click “Publish”.
- Go to “Author Profile” and enter a URL for your social link. We will use this to test our new field.

- Go to “Authors”, then “Author Boxes“.
- Edit the layout you want to add social links to. In the example, below I’ll use the “Boxed” layout.

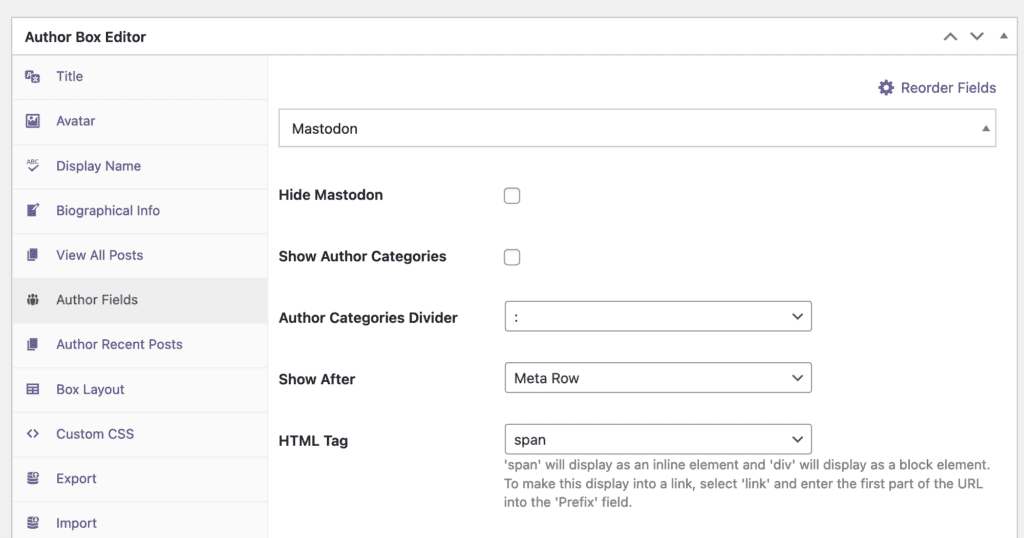
- Go to the “Author Fields” tab.
- Check the box to customize your new field.
You will immediately see the link to your social profile in the preview at the top of the screen:

Now you can modify this link to make it more attractive.
- Go to FontAwesome.com and search for the best icon for your profile.
- In this example, I’ll use this Mastodon icon.
- Enter the HTML code for the icon into the “Display Icon” field, as in this screenshot below.
- I’ve also changed the “Display” setting to be simply “Field Icon”.
- Finally, I’d recommend choosing “link” for the “HTML Tag” field.

This will now complete the process and turn your icon into an active link. You may want to change the color settings for the field to match your site design:
