
This feature requires the Pro version of the PublishPress Revisions plugin.
PublishPress Revisions Pro has support for the Elementor plugin. This means that you can safely create copies of posts built with Elementor, make changes to this posts, and then republish them when you’re ready.
PublishPress Revisions is the ultimate tool for making content changes. Users get a safe space to work on content updates.
This guide shows to use PublishPress Revisions and Elementor together.
How to Create a Revision to Elementor Posts #
There are two ways to create a new revision of an existing post that uses Elementor. These guides are using the example of a user in the “Revisor” role.
One option is via the WordPress admin area.
- Find a published post or page that was created with Elementor.
- Click the “New Revision” link.
- On the next screen, you can click the “Edit with Elementor” button to make changes.

The second option is available on the frontend of your site.
- Visit the post or page that you want to modify.
- Click “New Revision” in the admin bar, as in this screenshot below:

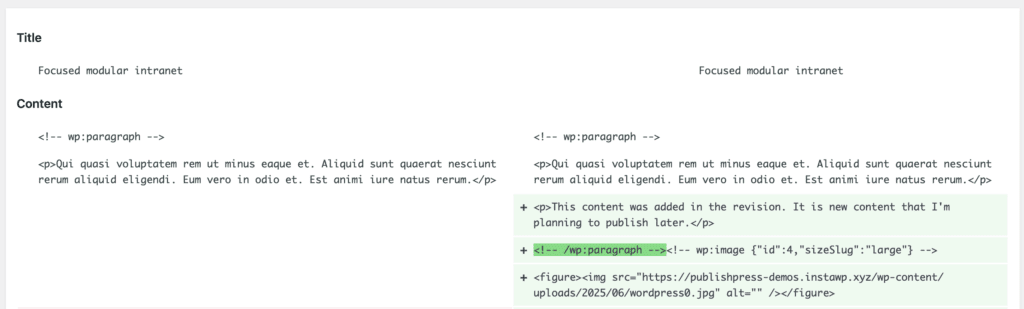
The Pro version of PublishPress Revisions will also integrate Elementor with the “Compare” feature. You will be able compare the previous and new version of posts created with Elementor.
How to Submit Revisions on Elementor Posts #
- If you have created the revision, you will have the Elementor editor opened. You can make changes here.
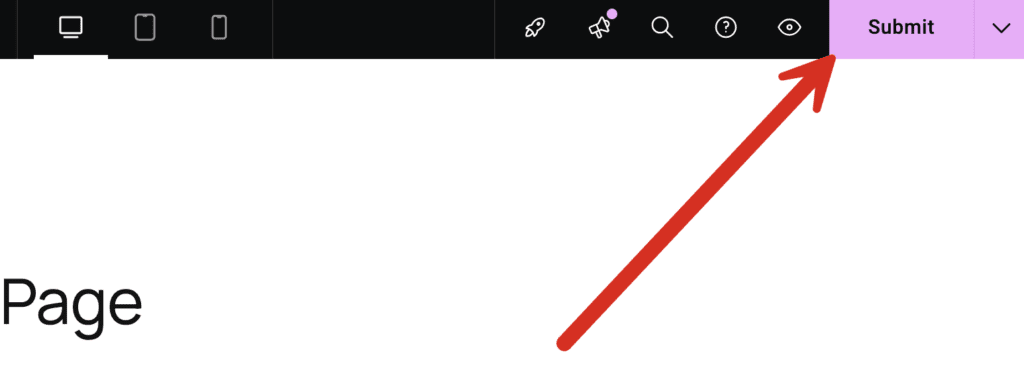
- After you make some changes, you can click “Submit” button.
- You will be redirected to preview the revision.
- In the WordPress admin area, anyone in the “Administrator” role can go to visit the “Revision Queue” screen and you see the submitted revisions for Elementor posts.

How to Schedule Revisions on Elementor Posts #
It is possible to schedule content updates to Elementor posts.
- While editing the post or page, click the date in the right sidebar.
- Choose the new date for these changes to go live after the revisions are approved.
- Make sure to “Save Draft” first, so the new date is saved.
- Then you can start making changes by click “Edit with Elementor” button
