
This guide will show you how to require users to create content in a specific category or parent page.
The solution in this guide is a flexible approach for sites with a substantial number of users in different roles. Depending on the needs of your site, the PublishPress plugins also offer other approaches such as this one based on user roles.
In this tutorial, we’ll use examples from a university.
Our sample site has categories for different university departments. Our aim will be to restrict some users to posting in some categories, or underneath some parent pages. By default, Categories are only available on WordPress Posts. However, you can add Categories to other post types and so you will be able to use the tutorial for those post types too.

Our site also some pages for different areas of the university:

We are going to use the PublishPress Permissions plugin to restrict access for the Authors role. They will only be able to create:
- Posts in the “Engineering” category.
- Pages under the “North Campus” parent page.
Restrict which categories users can post in #
Here’s the process we’ll use to set up this category restriction:
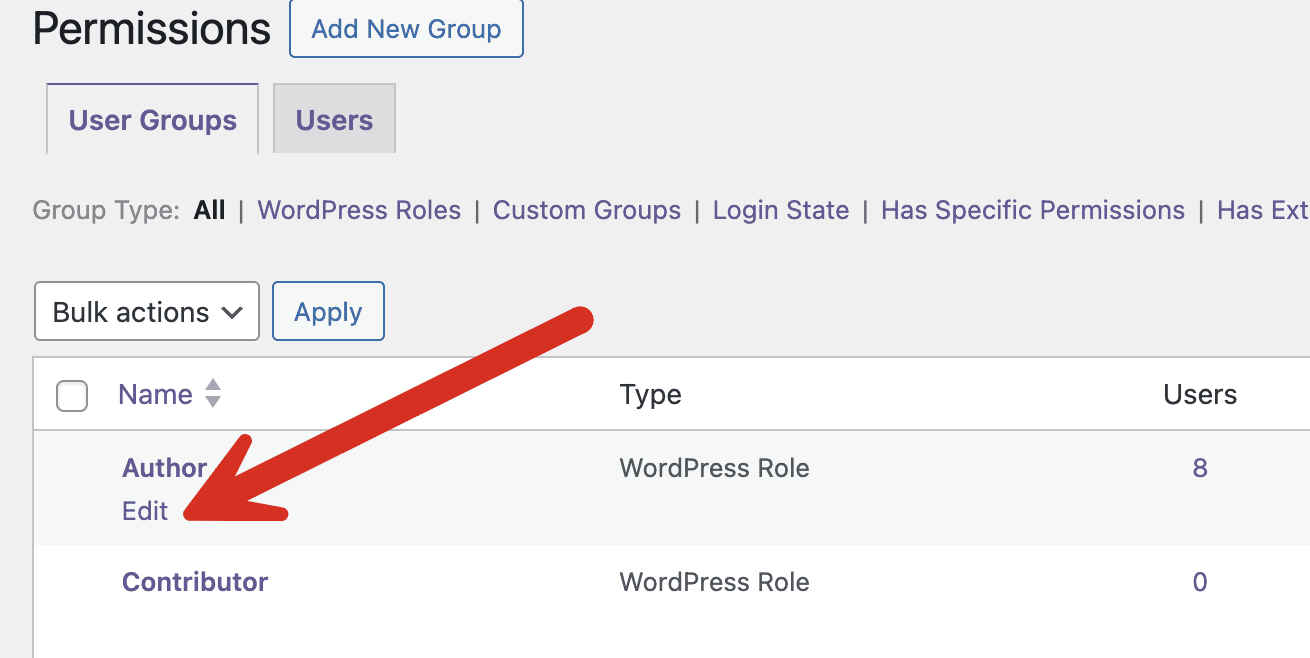
- Go to “Permissions” in your WordPress admin menu.
- Click “edit” for the “Author” role:
- Click “Set Specific Permissions”.
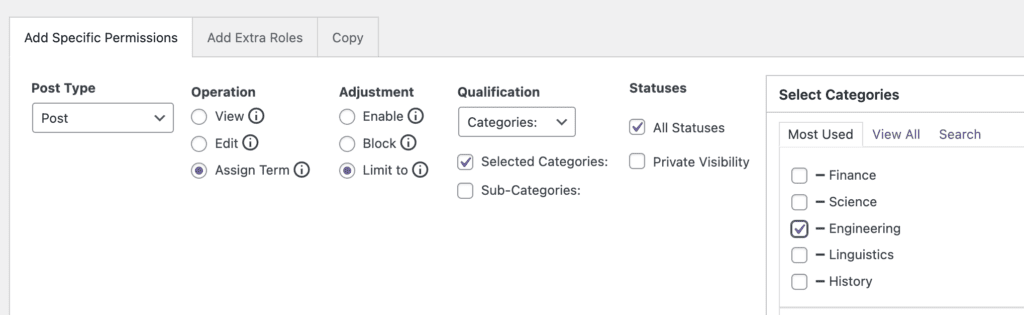
- Post Type: choose “Post”.
- Operation: choose “Assign Term”.
- Adjustment: choose “Limit to”
- Qualification: choose “selected Categories”.
- Select Categories: choose “Engineering”.
- Click “Add Selected”.
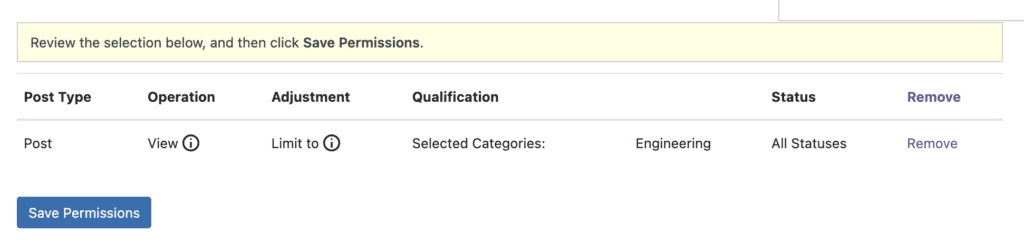
- Click “Save Permissions”.
- You will see that your permissions are saved, as in the image below.
- You can now test the “Author” role.
- When you go to create a post, you will only be able to see and select the “Engineering” category.

Restrict where users can create sub-pages #
Here’s the process we’ll use to set up the sub-page restriction:
- Go to “Permissions” in your WordPress admin menu.
- Click “edit” for the “Author” role.
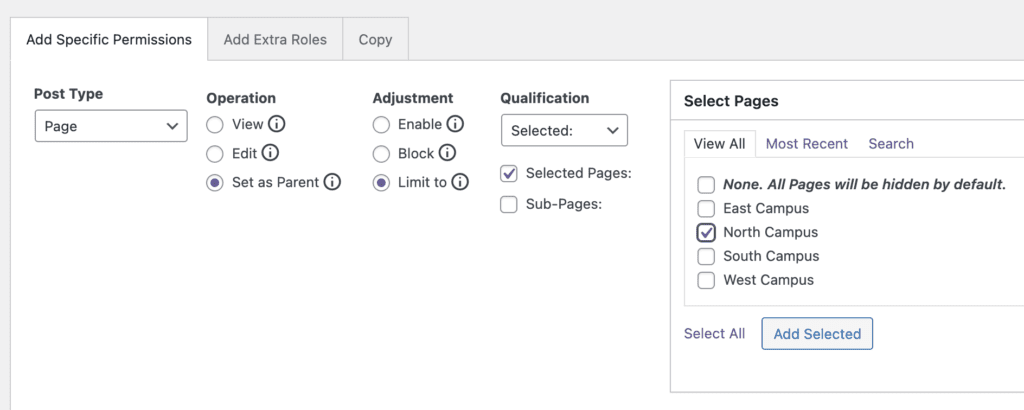
- Post Type: choose “Page”.
- Operation: choose “Set as Parent”.
- Adjustment: choose “Limit to”
- Qualification: choose “selected Pages”.
- Select Categories: choose “North Campus”.
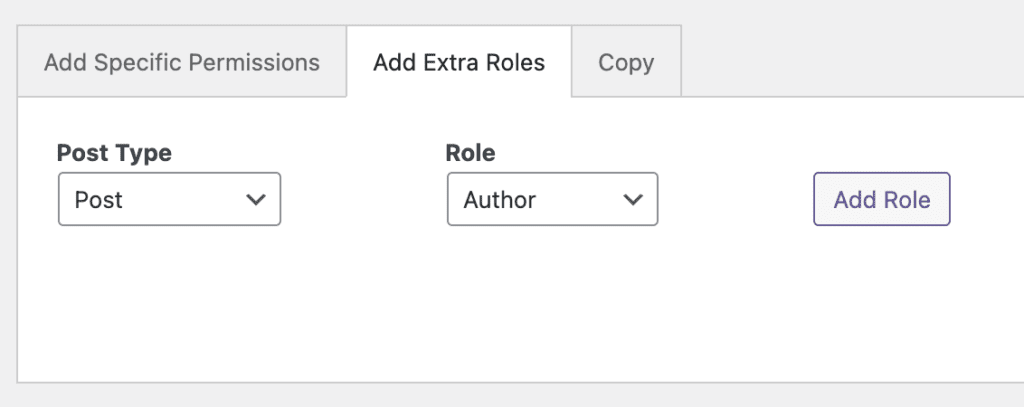
Because Authors are blocked from accessing the “Pages” area in WordPress, we will also need to give them access.
- Click “Add Extra Roles”.
- Post Type: choose “Page”.
- Role: choose “Author”.
- Click “Add Role”.
- Click “Save Roles”.
- You can now test the “Author” role.
- When you go to create a post, you will only be able to create pages with the “North Campus” parent page.
