
By default, WordPress has 8 post statuses. However, many WordPress plugins will create their own custom statuses. For example, WooCommerce will create statuses to allow eCommerce product orders to be in statuses such as “Refunded” or “Completed”.
This guide will show you how to add your own statuses.
How to add new WordPress statuses #
This plugin allows you to create custom statuses for WordPress posts. The plugin is optimized for the new block editor, but should also support Classic Editor and some pages builders.
This screenshot below gives you an idea of how PublishPress Statuses will appear on your site:

Pre-Publication Statuses #
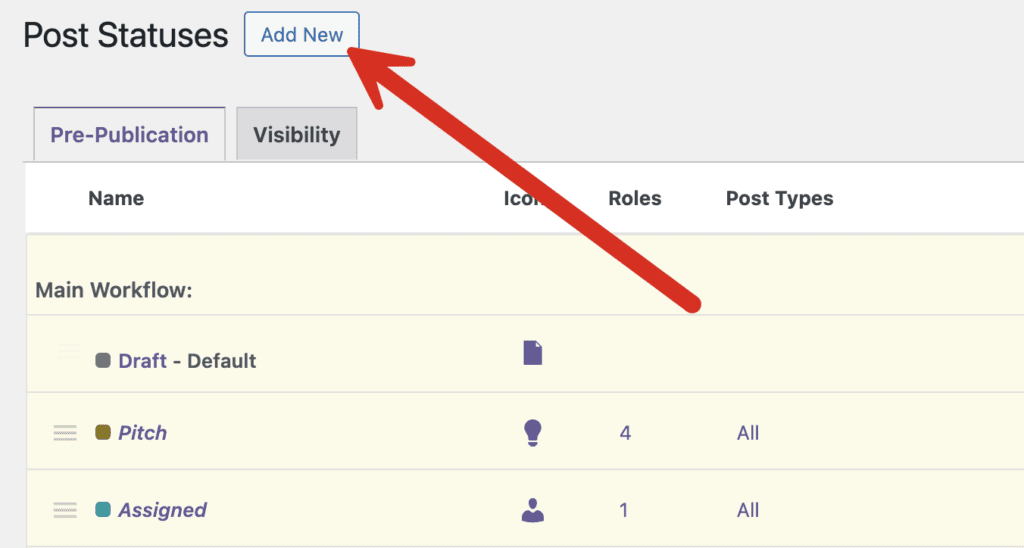
After installing the PublishPress Statuses plugin, go to the “Statuses” link in the WordPress admin. You will see the “Post Statuses” screen below. It contains statuses such as “Draft” and “Pending Review”. This “Main Workflow” must be used for posts, but you are able to add new statuses and re-arrange them.
- Draft: This is the WordPress default status and can not be modified. It can not be removed from its “Default” position.
- Pitch: This is a new status created by the plugin and can be re-ordered or disabled.
- Assigned: This is a new status created by the plugin and can be re-ordered or disabled.
- In Progress: This is a new status created by the plugin and can be re-ordered or disabled.
- Pending Review: This is a core WordPress status and can be re-ordered but not disabled.
- Approved: This is a new status created by the plugin and can be re-ordered or disabled.

To create a new statuses, click the “Add New” button:
Statuses in the Post Editing Screen #
When using PublishPress Statuses with the block editor, look for the “Workflow” button in the top-right corner of the screen.
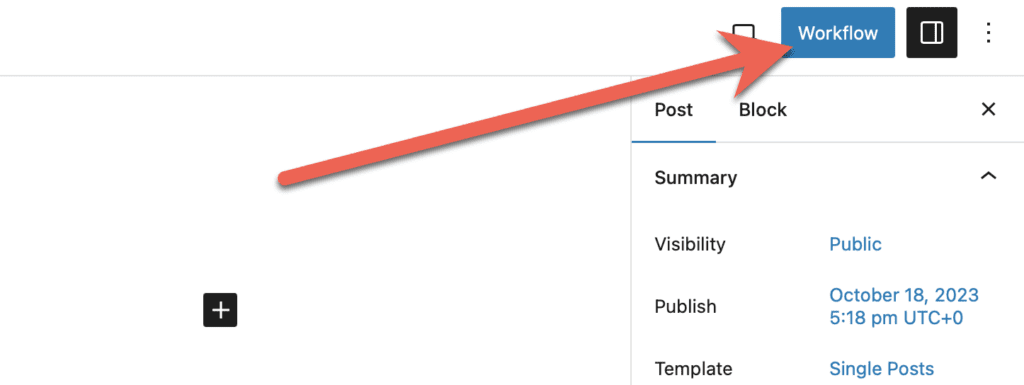
- Click the “Workflow” button and you'll be able to see the available statuses. These statuses are illustrated with the icons and colors from the options we saw earlier in this guide.

You can configure the operation of this feature using the “Settings” area in PublishPress Statuses. In the “Workflow sequence” area, you can choose to default the user choice to the next setting in the workflow, or the highest available setting.
