
This feature requires the Pro version of the PublishPress Permissions plugin.
In this guide, we'll show you some example uses for the Editorial Circles feature in PublishPress Permissions Pro.
Example: Only Edit Posts from the Same Role #
In this example, all the users in the Editor role will only be able to edit posts that were authored by other members of the same role.
- Start with the PublishPress Permissions Pro plugin installed on your site.
- Go to “Permissions”, then “Settings” in your WordPress admin menu.
- Click the “Features” tab and make sure the “Access Circles” box is checked.
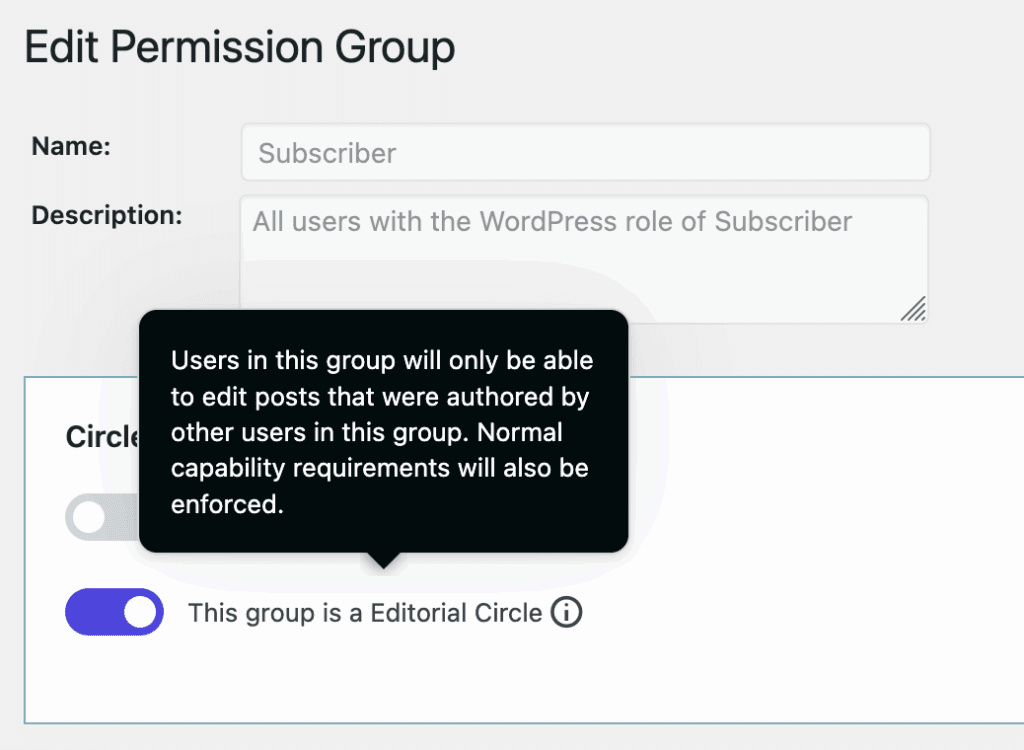
- Go to “Permissions” then “Groups” in your WordPress admin menu.
- Edit the “Editor” group.
- Check the box, “This group is a Editorial Circle”.
- Click “Update Group”.
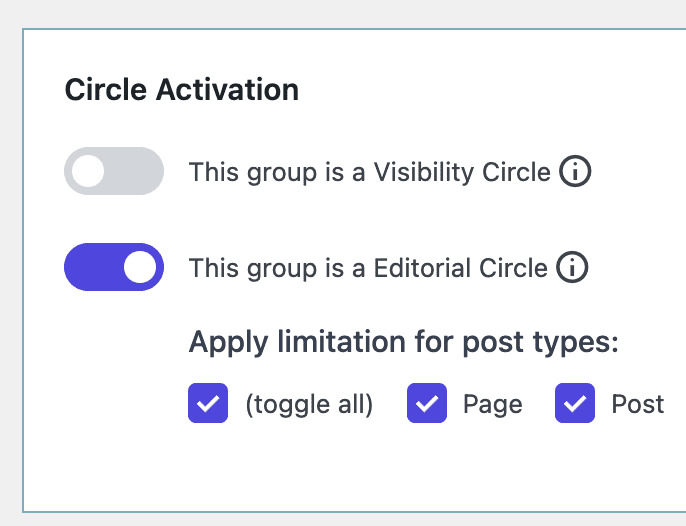
Next, you can choose to create an Editorial Circle only for some post types. In the screenshot below, this feature is enabled for Posts and Pages.
- Click “Update Group”.
- Now that this is complete, all the users in the Editor role will only be able to edit posts that were authored by other members of the same role.
Example: Create Circles for Multiple Roles #
In the example above, we only had one Editor role.
In some situations, you may want many roles that act in a similar way. For example, imagine a university website has 30+ departments. Each department wants to create and edit it’s own pages.
The best way to do this is to duplicate the Editor role and use these roles for Editorial Circles. This example builds on the previous example. This time we are going to create 30+ Editorial Circles.
- Install the PublishPress Capabilities plugin.
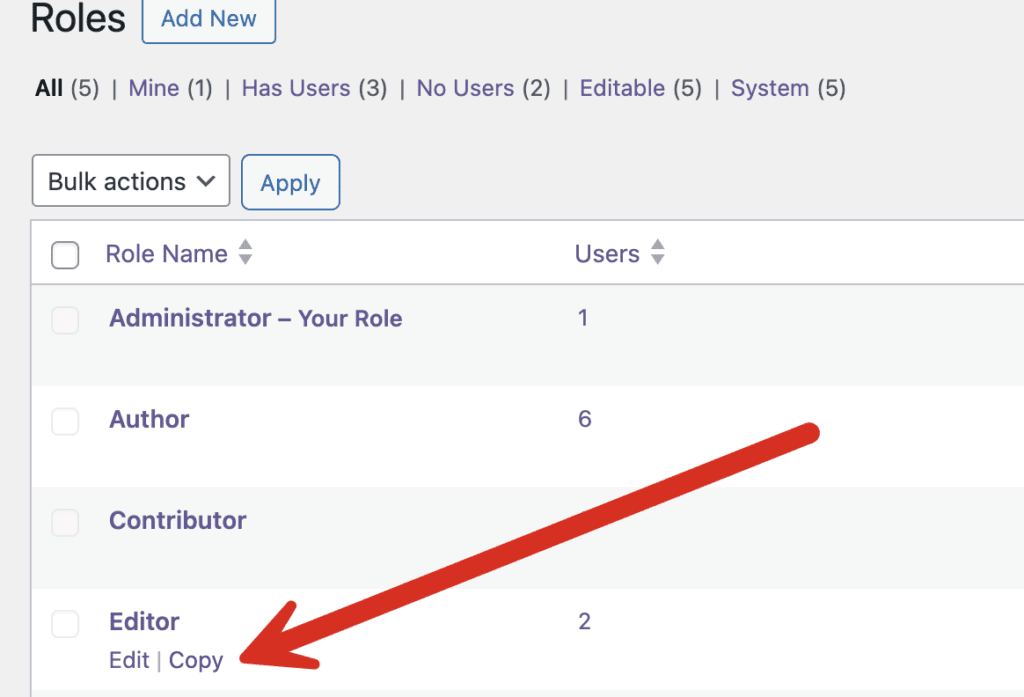
- Go to “Capabilities” then “Roles” in the WordPress admin menu.
- Click “Copy” next to the Editor role, as in this screenshot below:
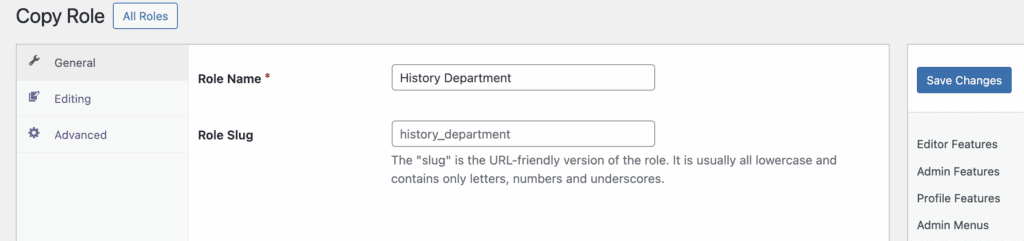
- Enter the name of a department. For example, enter “History Department”.
- Click “Save Changes”.
- Repeat for other departments.
After creating a role for each department, you can now go back to the example above and turn these new roles into Editorial Circles.