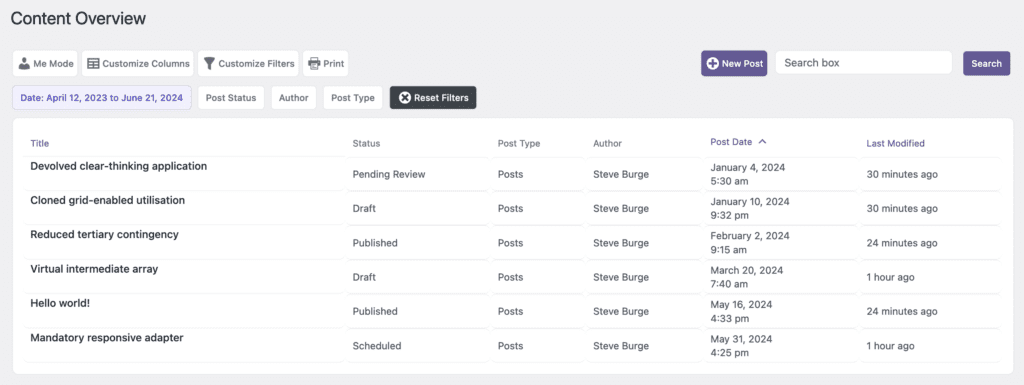
The Content Overview Screen is available in the PublishPress Planner plugin. This screen gives you an overview of all the content on your site. You can choose the data to see for your posts and also choose how this data is filtered.
Introducing Content Overview Filters #
There are 6 default columns on this screen: Date, Post Status, Categories, Author, and Post Type. You can see those filters in this screenshot:
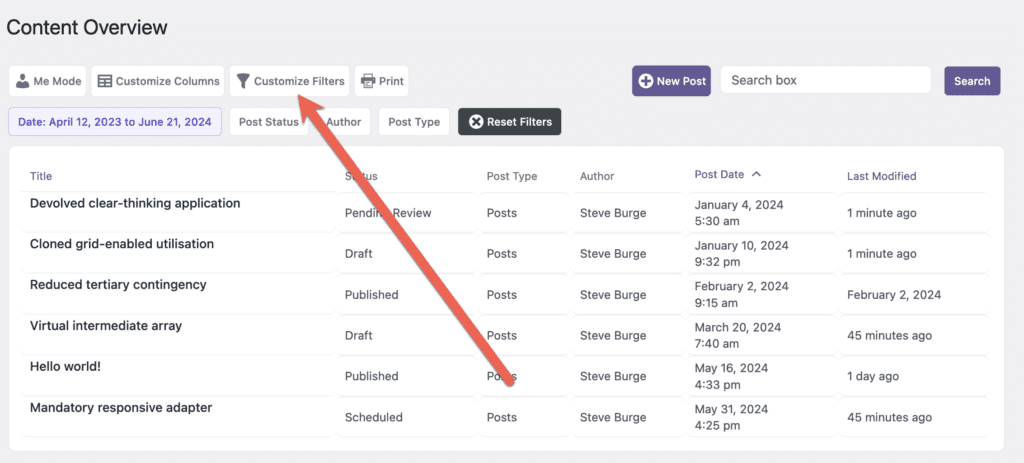
How to Add Filters #
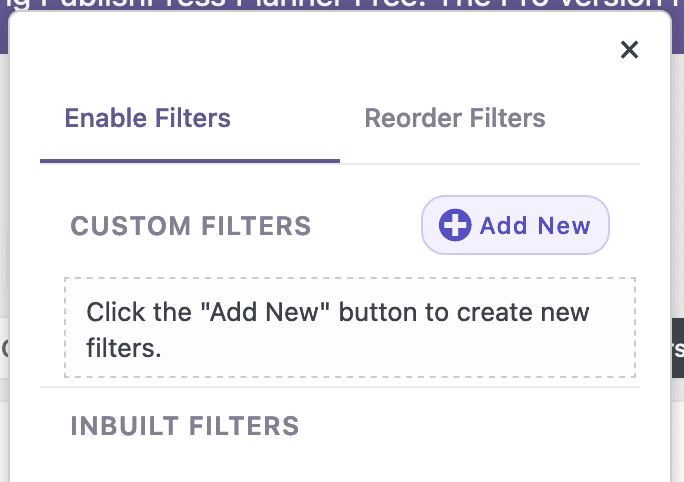
It is possible to customize the filters on this screen. Click the “Manage Filters” button:
In the modal, you can check or uncheck the boxes for all the inbuilt filters.

In this screenshot below, you can see filters for Editorial Fields and Taxonomies. If you click any of these elements, they will be added as new filters on your Content Overview screen.

How to Add Filters (Pro) #
This feature requires the Pro version of the PublishPress Planner plugin.
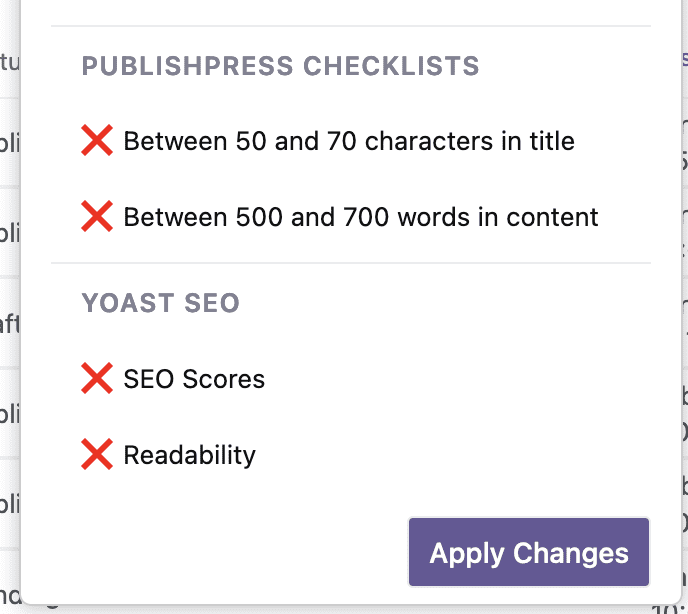
The Pro version of PublishPress Planner has automatic support for plugins that include Yoast SEO and PublishPress Checklists. In the screenshot below, you can see that those options are ready to be checked.
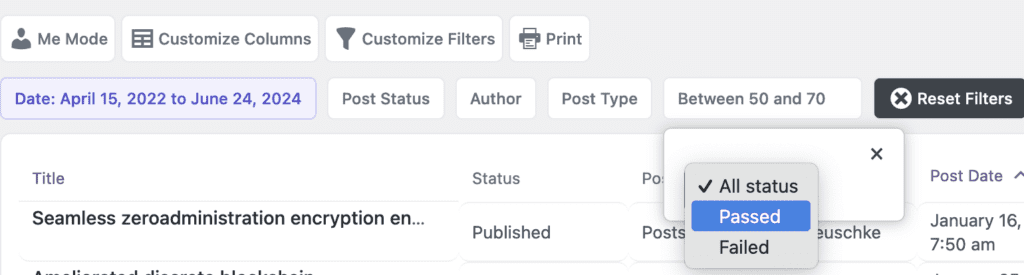
In this example screenshot below, we’ve added a filter from PublishPress Checklists. You can use the filter to find all posts that have either “Passed” or “Failed” that checklist requirement.
How to Add Custom Filters #
The Content Overview screen allows you to add custom filters. These filters can use any metadata stored on your site by WordPress plugins.
- Click the “Manage Filters” button.
- Click the “Add New” button.
- Enter a “Column Title”.
- Click the “Select Metakey” option.
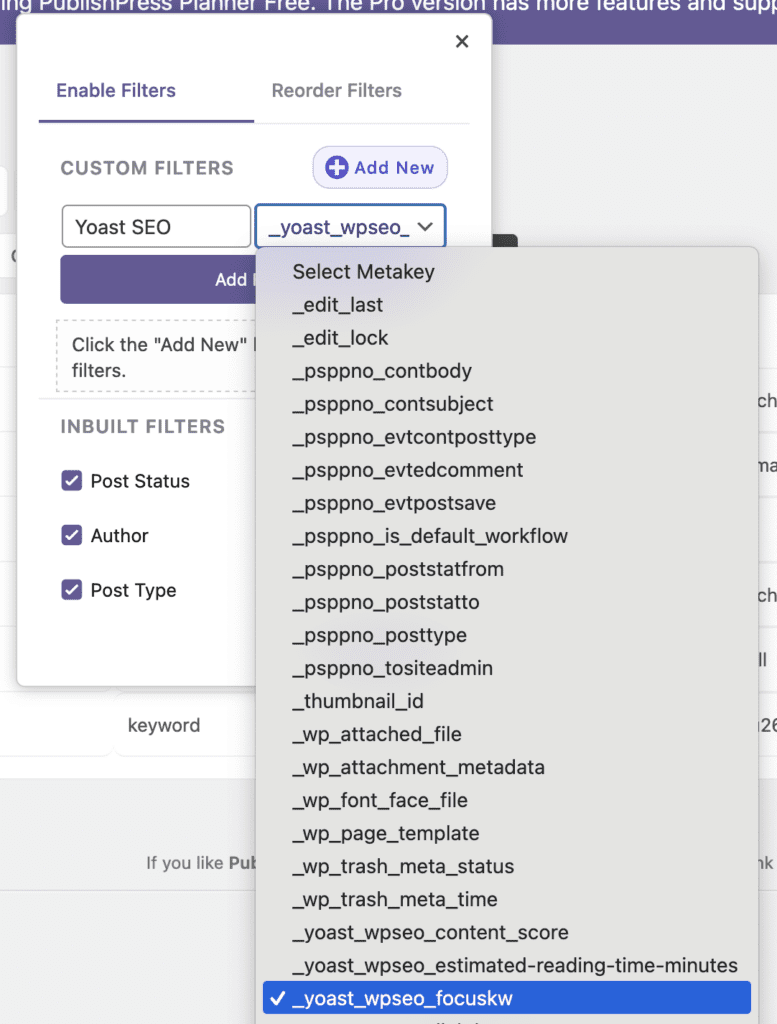
- In this screenshot below, we are selecting the “_yoast_wpseo_focuskw” option. This will allow you to filter for keywords from the Yoast SEO plugin.
- Click “Add Filter”.
- Click “Apply Changes”.
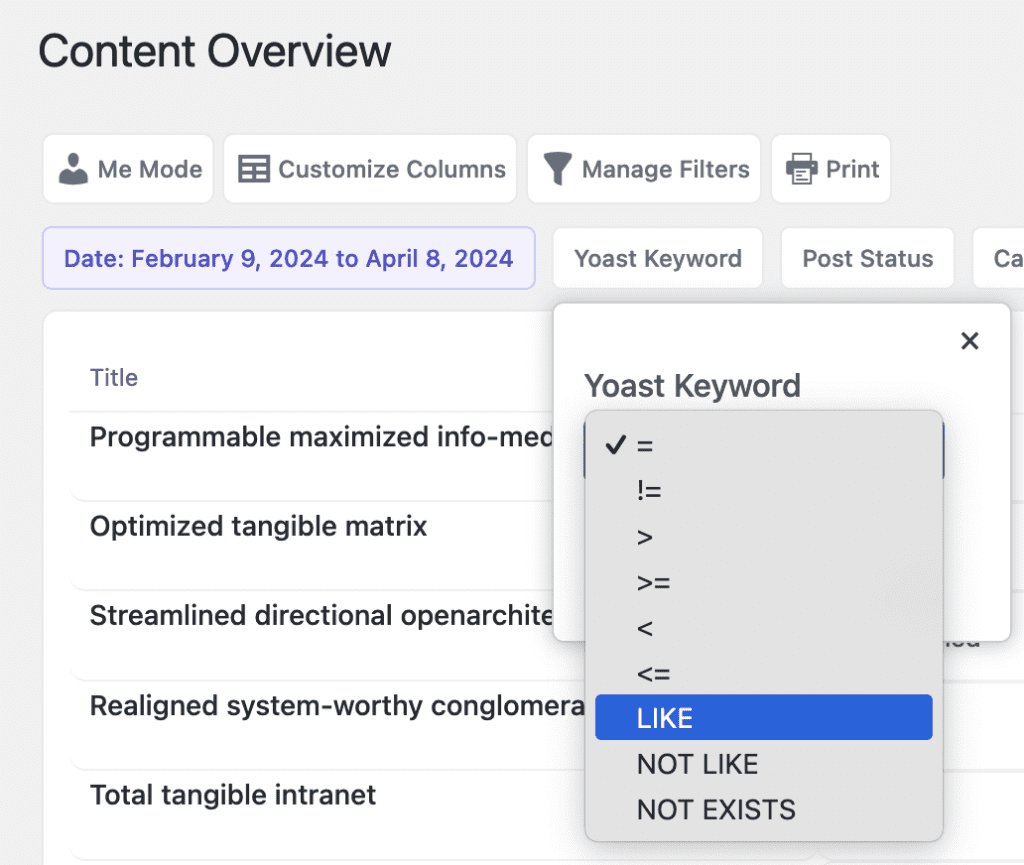
You will now see the “Yoast Keyword” column has been added to the screen, as in this screenshot below:
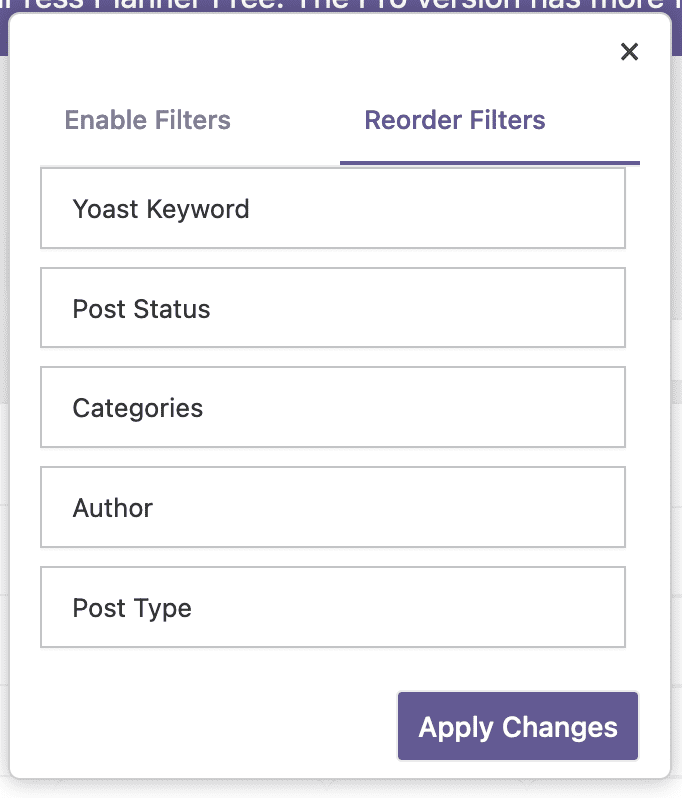
How to Reorder Filters #
It is possible to change the order of filters in the Content Overview screen
- Click “Manage Filters”.
- Click the “Reorder Filters” tab.
- You can drag-and-drop the filters into a new order.