
If you’re not receiving PublishPress Planner notifications correctly, there are several possible reasons. This article will help you check for common solutions.
#1. Check the Notifications Log #
Some PublishPress Planner users report that they do not receive email notifications. If you’re having a problem with notifications, we recommend that you use the Notifications Log feature. This plugin will keep a record of all the notifications sent from PublishPress Planner. If emails are not appearing in your log, your Notifications are not configured correctly.

#2. Are emails being sent from your site? #
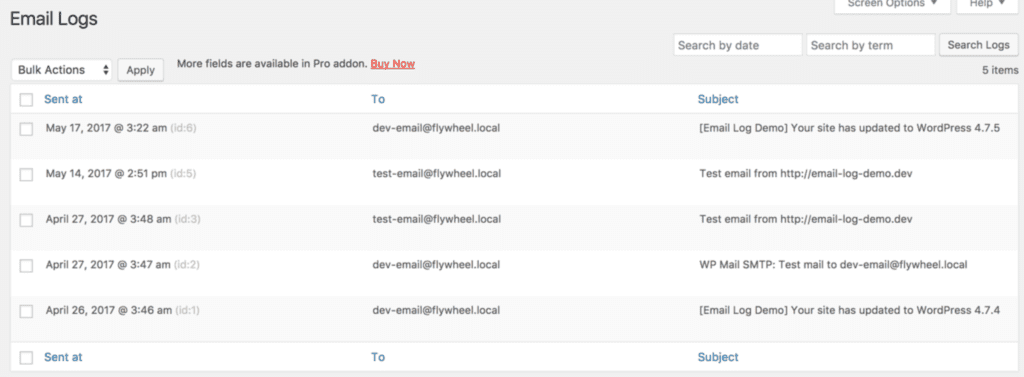
Check to see if any emails are being sent out from your site. You can use a plugin such as “Email Log” to view emails that are being sent. Are they arriving in users’ inboxes? If they aren’t arriving, there may be an issue with email delivery from your site.
#3. Change the Aysnc option #
This step will be useful if notifications are not sent at the correct time. Async is a useful feature that can improve your notification sending, particularly for scheduled content and for busy sites.
If the Async option is enabled, PublishPress Planner will use WP Cron to send the notifications. WP Cron is only triggered when someone visits your website so it is best suited for sites with lots of visitors. Async isn’t well suited for all sites with low traffic and so it is disabled by default.
- Go to Planner > Settings.
- Click to the “Features” tab.
- Uncheck the box for “ASync Notifications”.
- Click “Save Changes”.

If you enable Async and continue to have problems with notifications, try using the “Advanced Cron Manager” plugin to check for issues with WP Cron.
If none of the above steps allow you to send notification reliably, you can move on to the next step and set up a true Cron Job on your server.
#4. Set up a Cron Job #
This step is worth trying if Async is enabled, but your notifications are not sent consistently, or have delays. Instead of using WP Cron, you can add a true Cron Job to your server.
This will trigger notifications on a specific frequency. It can run every minute, every hour, or other schedules.
This step will tell WordPress to not run the wp-cron.php file, letting us handle the execution of that file directly in the cron job.
- Edit your wp-config.php file adding the following code to after the definition of the database constants:
define( 'DISABLE_WP_CRON', true );If your host provides cPanel, you can use its interface for creating the cron job. If you don’t have cPanel, please contact the host support team asking for help.
- Log into cPanel
- Go to Advanced > Cron Jobs
- Select Twice per hour (or other desired frequency. Sometimes you will want it to run more frequently) from the Common Settings drop-down
- Select Every Hour from the Hour drop-down
- Fill in the code to run the cron job and click Add new Cron Job.
cd /home/the_username/public_html; php -q wp-cron.phpCheck the correct path to your public html folder and add it to the command above. Considering every host can have a custom structure, we advise you to contact the host support if needed.