
What are Private Posts and Pages in WordPress?
“Private” is one of eight post statuses available in WordPress. These statuses control whether WordPress posts are visible to the entire world, waiting for moderation, or sent to the trash to await deletion.
When you write in WordPress, you will most commonly see the Draft, Pending Review, and Publish statuses.
The Private status is used less frequently, but it can be useful in some situations. Private posts are for content that you only want high-level users to see. These posts are most useful for internal communication and documentation. I would not recommend storing top-secret information in these posts, but rather want to hide content from regular users.
Table of Contents
How to Create Private Posts
Let’s start by seeing how to add private posts on your site. This guide is using the the block editor. The process will look very similar if you’re using the Classic option, or most page-builder plugins.
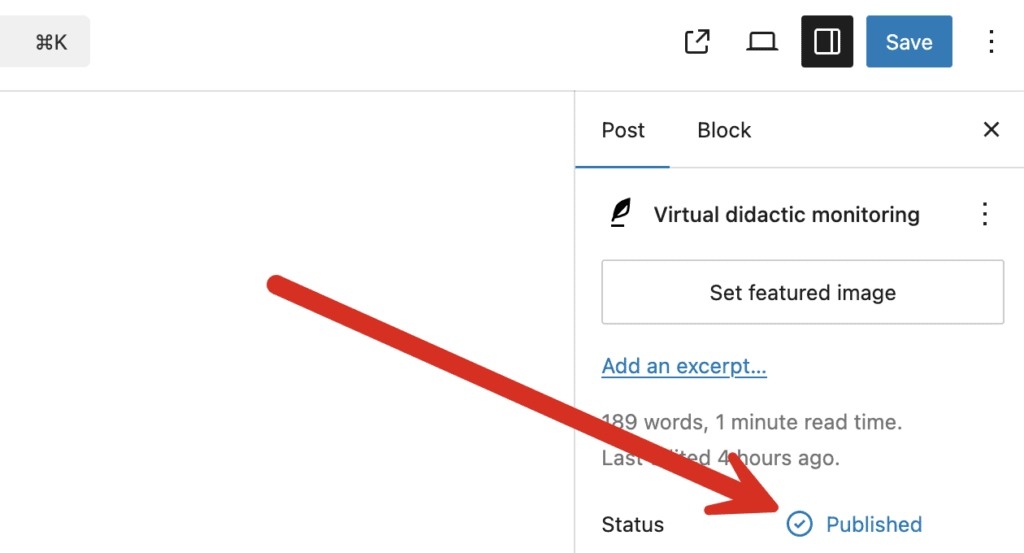
- When you are editing a post, look for the “Status” area in the right sidebar.
- Click the “Publish” link as in this screenshot below:
- Check the “Private” checkbox as in this next screenshot:

This post will now be completely hidden from any user who is not in the Administrator or Editor roles. The only exception to this will be the user is marked as the author of a post.
In the WordPress admin area and on the front of your site, “Private” posts will be completely hidden to other users. They will not even know that Private posts exist.
Administrators and Editors will see a “Private” label attached to the post, as in the image below:

On the front end of the site, those users will also see the “Private” label.

Anyone who does not have access will receive a “Page Not Found” message. With the Twenty Twenty-One theme, the message is “Nothing here”. Even if they know the URL of the post, they will see no acknowledgment that the posts exists.

Password ProtectionPassword Protection
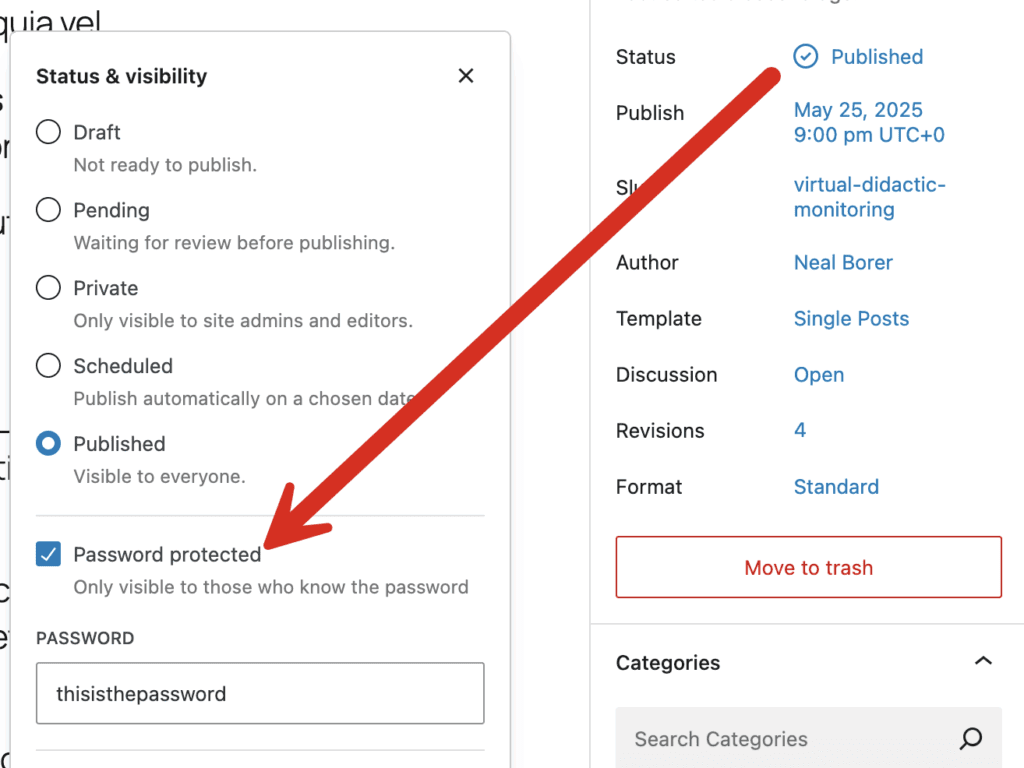
One variation on the “Private” option in WordPress is the “Password Protected” choice. After you check this box, you can enter a password, as in the image below:
On the frontend of your site, users will have to enter a password before they view the content. You can see the password box in this next screenshot.

The “Private” and “Password Protected” are similar features which is why I included them in this blog post. However, technically they are completely different and the “Password Protected” feature does not use the “Private” status.
Media in Private Posts
Please be careful with the media used in Private posts. WordPress only restricts access to the post. Image and file permissions are treated differently.
Images and files in Private posts can be publicly visible if someone knows the URL. They and can also be found by people with access to your Media Library.
The best solution to this is the PublishPress Permissions Pro plugin that can extend restrictions from posts to media items in that post. You can block URL access and control Media Library access.
The Private Status in the Database
You’ll find the “private” status for posts is set in the wp_posts table. The post_status column is used for the status.

If you do password protect your post, it is not technically under the “private status”. A password-protected post will be set to the “publish” status and the password will be stored as plain text in the post_password column.

If you want more technical background on user access for posts, check out our complete guide to WordPress user permissions in the database.
Who Can See Private Posts
Earlier in this post, I mentioned this briefly, but it’s worth repeating here:
- Administrator and Editors: Can see all the private posts on your site. They can also change the privacy settings for each post.
- Authors and Contributors: Can see their own private posts and change the privacy settings for their posts. They cannot see private posts created by other users.
- Other users and guests: They can not even see Private posts.
Change Who Sees Private Posts
It is possible to change who is able see and manage Private posts. The best way to do this with the PublishPress Capabilities plugin.
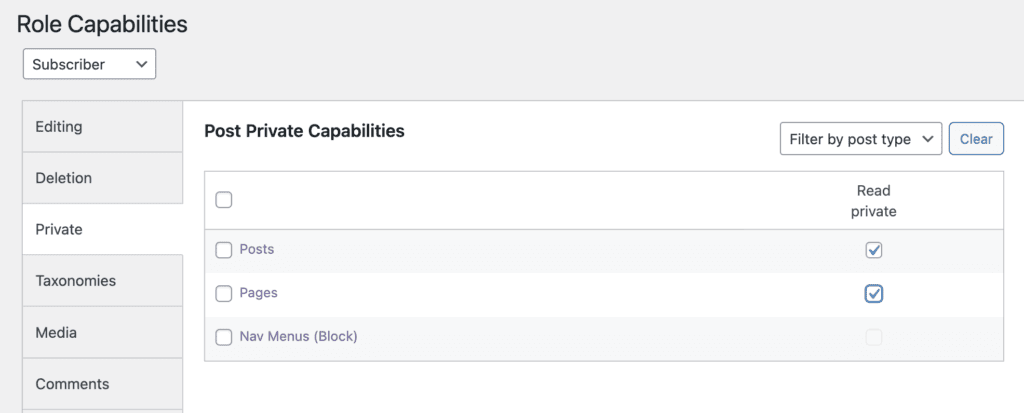
This image below shows how you can allow users in the “Subscriber” role to read Private posts and pages. This works by giving users the read_private_posts and read_private_pages capabilities. This will not allow them to see Private posts or pages in the WordPress admin area. However, they will be able to read them on the frontend of your site.
Set Your Whole Website to Private
PublishPress Permissions Pro has a feature that allows you to make your whole website “Private”.
- Go to Permissions > Settings.
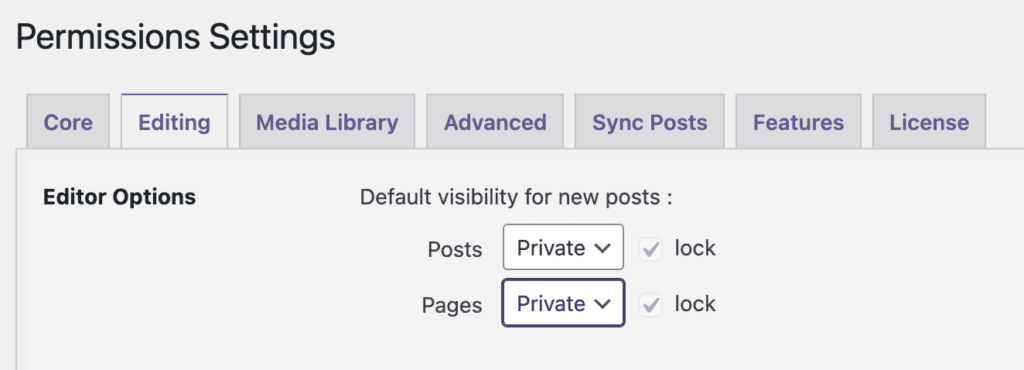
- Click the “Editing” tab.
- Change the default visibility for new content to “Private”.
- Check the “Lock” box.
Now you can test out this setting:
- Create a new post.
- Click “Publish” when your post is ready.
- After you have published your post, come back to the editing screen.
- The “Status” box will be set to “Private”.
Teasers for Private Posts
The “Teaser” feature in PublishPress Permissions Pro is useful if you want to give users details about content they are not allowed to see.
This guide will show you how to set up a Teaser. You can use it encourage users to join your site.
- Go to Permissions > Teacher
- You can choose from different teaser options. In this example, I’m going to choose “Configured Teaser Text”.
- Click “Save Changes”.

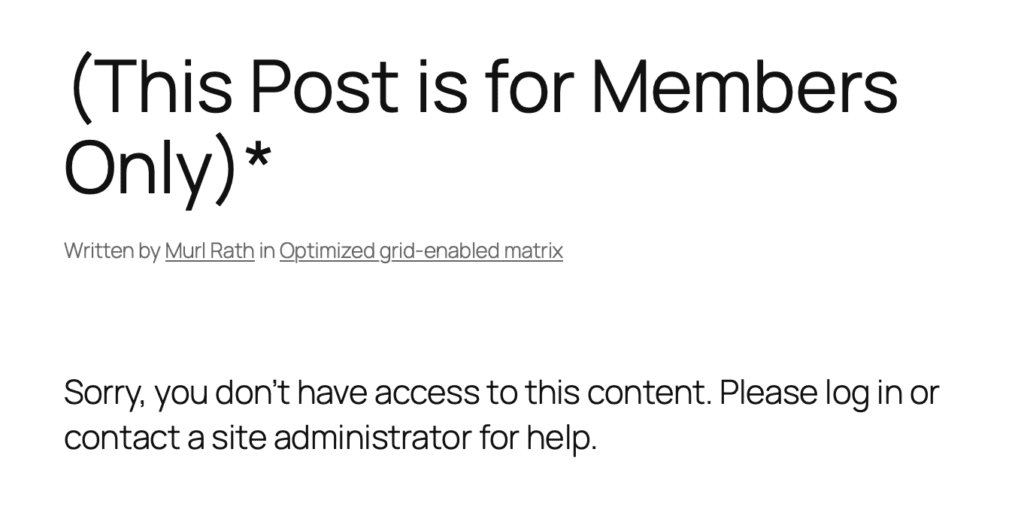
As a logged-out visitor, go to the post that you restricted access to at the beginning of this guide. The best way to do this is by opening a private window in your browser, or opening a new browser. This image below shows what you’ll see. The logged-out visitor will see the message “Sorry, you don’t have access to this content. Please log in or contact a site administrator for help.”
The Best Plugin to Control Access to Your WordPress Content
PublishPress Permissions allows you to enable or deny access to posts, pages, categories, tags and more. You can control who can view and edit your WordPress content.

The Best Plugin to Control Your WordPress Users
PublishPress Capabilities enables you to customize what users see in every area of WordPress from editing posts and pages to admin menus, profile pages.
