
How to Create a WooCommerce Product Editor
We had a question from a PublishPress user asked us about an interesting configuration for their WordPress eCommerce site.
This user wanted to create a WooCommerce Product Editor role. Any users in this role will be responsible for editing all the WooCommerce products, but will not have access to other areas of the site.
This is possible with the PublishPress Capabilites plugin. Here’s our guide to building a WooCommerce Product Editor role. Normally there are two roles in WooCommerce called “Shop Manager” and “Customer“. We’ll be expanding that list in this guide.
Table of Contents
Step #1. Install the recommended plugins
- Install WooCommerce.
- Install the PublishPress Capabilities plugin.
Step #2. Create the “Product Editor” role
This is the key step in the process. We’re going to create and configure the user role for our editors.
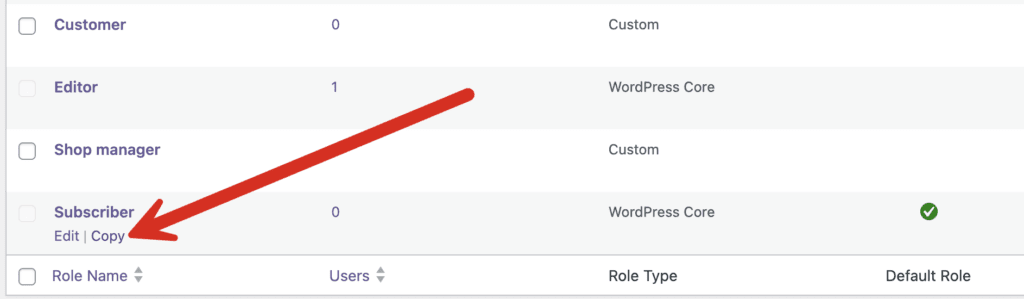
- Go to “Capabilities” then “Roles” in your admin menu.
- Click “Copy” under the “Subscriber” role.
- In the “Role Name” box enter “Product Editor”.
- Click “Create Role”.

- Go to “Capabilities” in your admin menu.
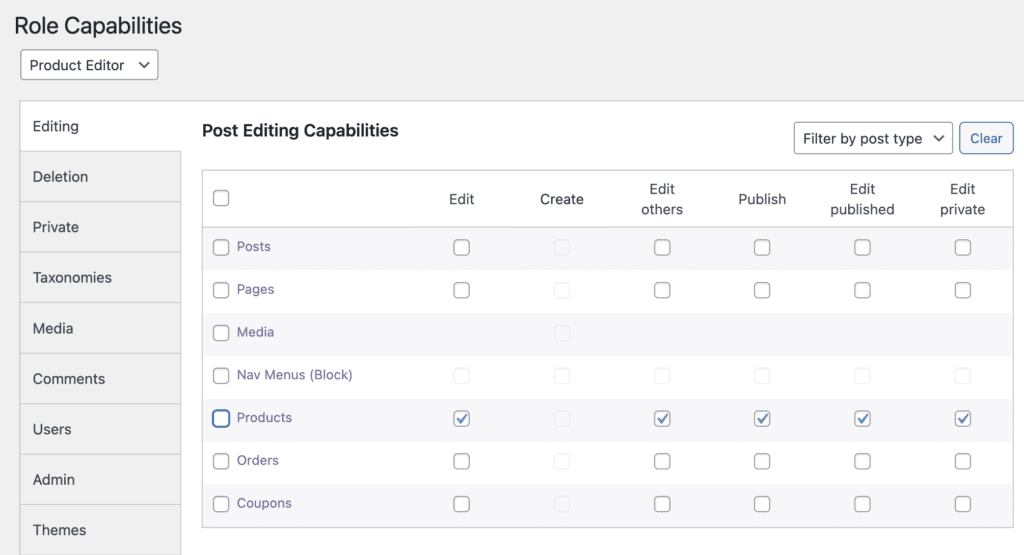
- Choose “Product Editor” from the dropdown menu.
- Give your user role the capabilities in this image below.
- In the right sidebar, add the “view_admin_dashboard” capability. This requirement is explained in another guide.
- Click “Add to role”.
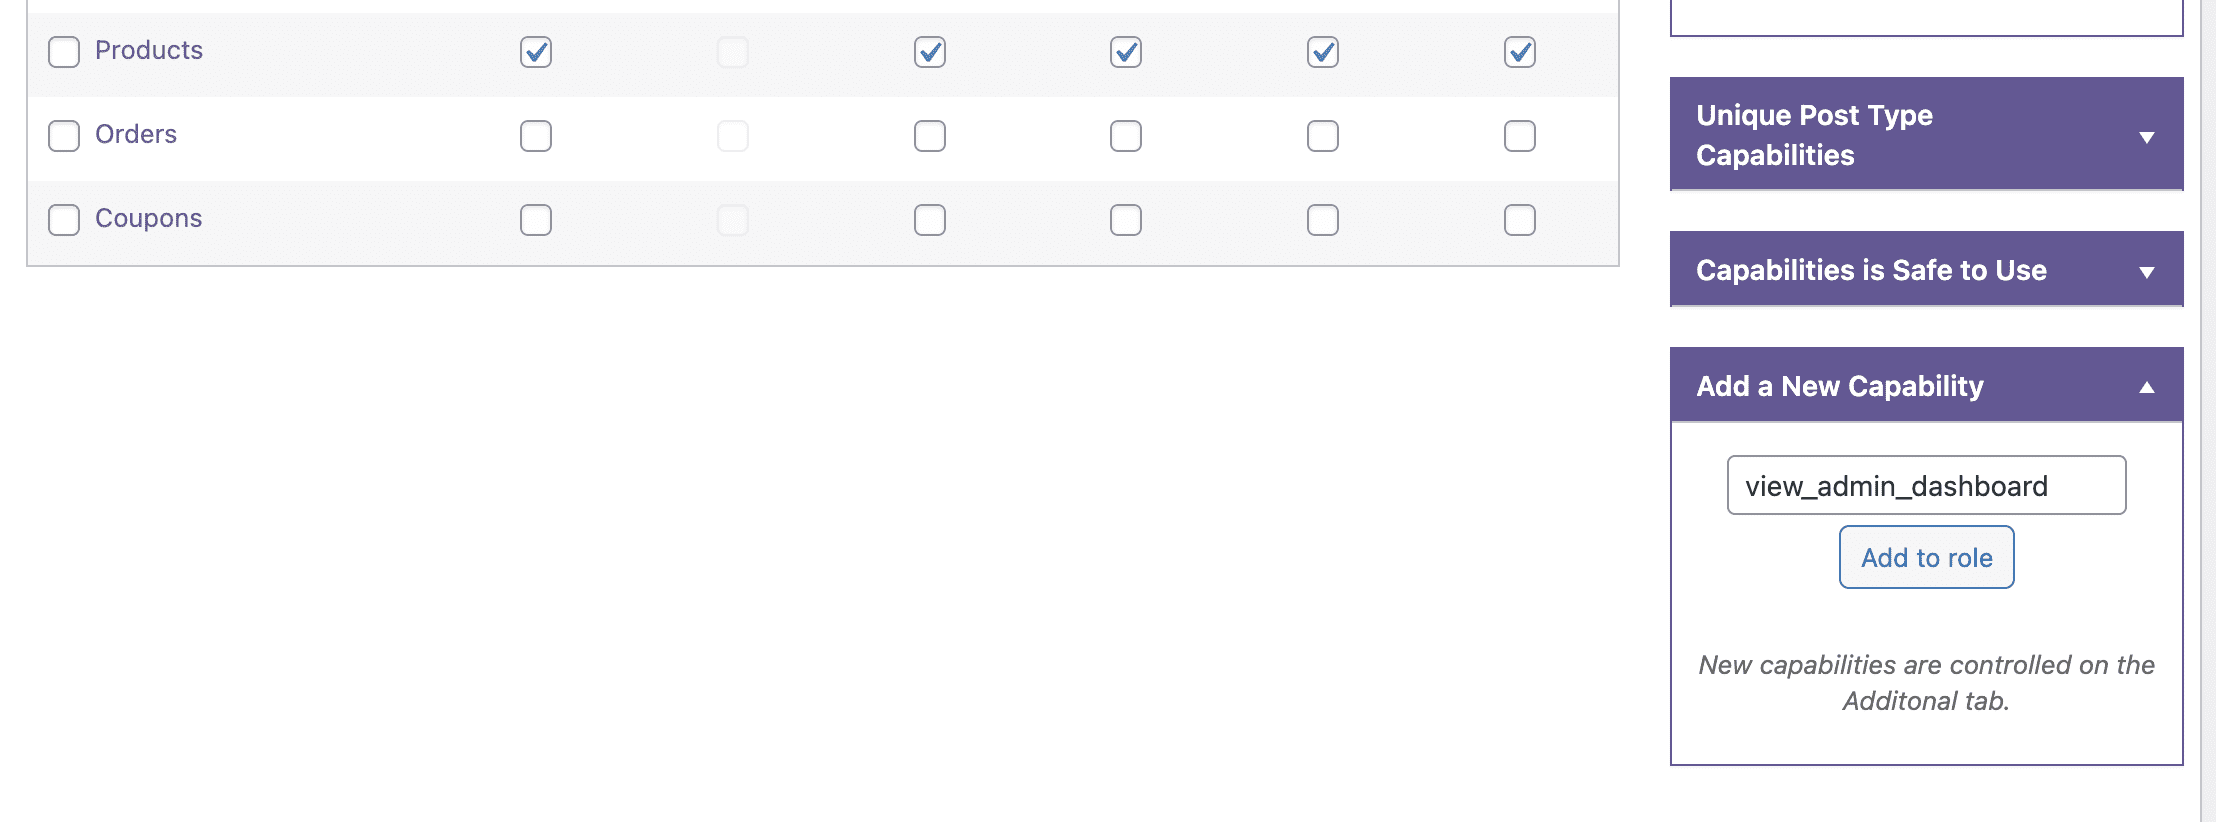
- Go to the “Additional” tab and make sure that “view_admin_dashboard” is checked for this role.

Step #3. Test the new user role
You can now test the user role that you have created. This is possible with the User Testing feature in PublishPress Capabilities. When you log in as a Product Editor, this screenshot shows what you will see:

When you visit the “Products” screen, you will be able to see and edit products.

Video version of this tutorial
WooCommerce Product Editor Summary
WooCommerce and the PublishPress plugins are a powerful combination. You can configure the permissions on your eCommerce store to meet your exact needs.
Other examples include controlling who can manage WooCommerce coupons, creating users who can only manage WooCommerce orders, and adding users who can only manage reports.

The Best Plugin to Control Access to Your WordPress Content
PublishPress Permissions allows you to enable or deny access to posts, pages, categories, tags and more. You can control who can view and edit your WordPress content.

The Best Plugin to Control Your WordPress Users
PublishPress Capabilities enables you to customize what users see in every area of WordPress from editing posts and pages to admin menus, profile pages.

Dear sir/madam
Is it possible to further the access of categories per employee? For example, I have 10 categories and assign 10 employees to one category each. Is it possible to have each only accessing their specific category without accessing the other categories? This is what I need for my store.
Gracious 🙏
Hi John. Thanks for using PublishPress. A guide like this can help: https://publishpress.com/knowledge-base/how-to-restrict-wordpress-users-to-posting-in-one-category/