
How to Get Client Approval for WordPress Posts
We had a really interesting question from a PublishPress user:
We have many clients who we write posts for. We write the posts 6 months in advance, and get them approved by the clients. Is this possible with the PublishPress plugins?
The answer is “Yes”, you can do this. In this tutorial, I’ll show you how to set up an approval process for WordPress posts.
Table of Contents
Step #1. Install the plugins
We will need two plugins for this guide:
Step #2. Create a “Client” user role
I recommend creating a new user role that is only for your Clients.
- Go to “Capabilities” in your WordPress admin menu.
- Choose “Author” and click “Copy”.
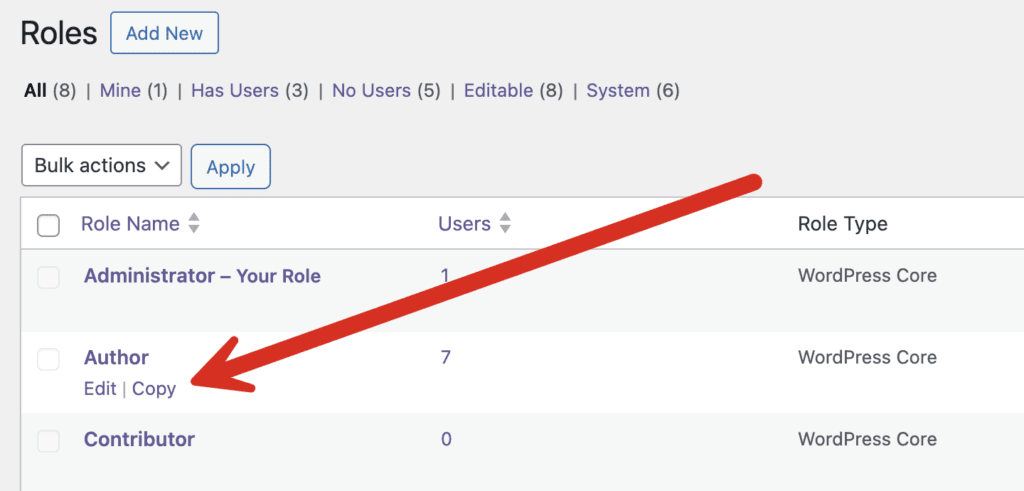
- Enter “Client” in the “Role Name” field.
- Click “Save Changes”.
Step #2. Create Clients
Now you’re ready to create accounts for your clients. I would recommend testing this with a dummy account before unleashing it on your paying customers!
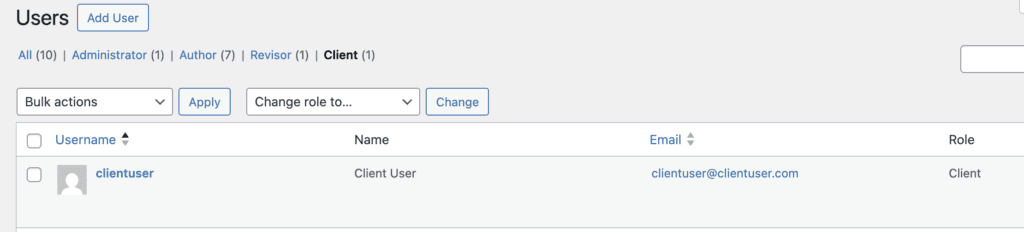
- Go to the “Users” link in your WordPress admin menu.
- Create a new user in the “Client” role.
Step #3. Set up the PublishPress Checklists plugin
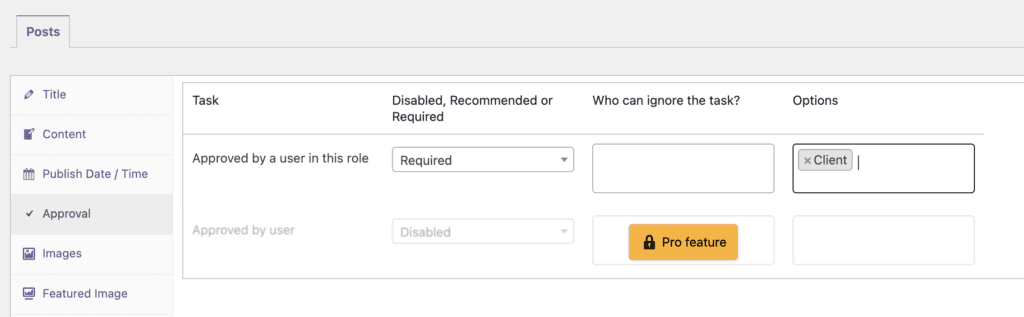
- Go to “Checklists” in your WordPress admin menu.
- You can choose from “Disabled, Recommended, or Required” options.
- You can choose “Who can ignore this task?“
- In the final box, you can choose which roles can approve posts. In the image below, posts can’t be published unless they are approved by a Client.
Step #4. Create your posts
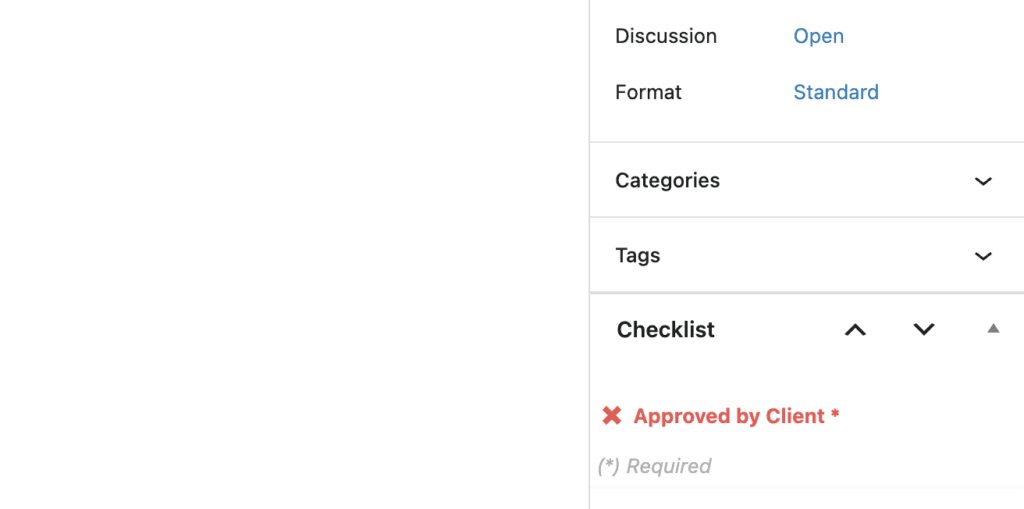
- Go to create a Post.
- In the right sidebar, you will a “Checklists” area. No-one can publish this post unless this red X is changed to a green checkmark. And the only person who can approve this post is someone in the “Client” role.
Step #5. Allow the Client to access the post
Your final step is to give your Client access to this post. You can use the PublishPress Permissions plugin to grant access to a single page.
Another option is to make the Client into the Author of the post temporarily. You can do that using the “Author” box:
That’s it. You’re all done. Your client can now login to the site and view the post. If they like what they see, they can give their approval with a green checkmark:

Video guide to this approval process
Summary of this Approval Process
There are many ways to customize this approval process for your use-case, but I hope this tutorial has given you a good, general introduction.
Using the PublishPress plugins, you absolutely can create an approval process where clients can log in and review the content you create.
The Checklists plugin is full of useful features like this. For example, it can also help you check for broken links in your post.
Get the PublishPress plugins
Join PublishPress today and you’ll get powerful publishing and permissions plugins to improve your WordPress site.

The Best Plugin to Control Access to Your WordPress Content
PublishPress Permissions allows you to enable or deny access to posts, pages, categories, tags and more. You can control who can view and edit your WordPress content.

The Best Plugin to Control Your WordPress Users
PublishPress Capabilities enables you to customize what users see in every area of WordPress from editing posts and pages to admin menus, profile pages.

Publish Consistently Excellent Content in WordPress
When you use PublishPress Checklists, you can define tasks that authors must complete before content is published. You can ensure that all your WordPress posts meet your high standards.
