
The Best Options for WordPress Photo Galleries
Long, scrolling pages are really popular right now, which makes sense. They’re more mobile-friendly than oversized navigations. They allow you to present a lot of information in a cleaner fashion. They’re also great for taking visitors through a logical journey, starting with their pain all the way through to your solution.
But just because visitors have become accustomed to the scrolling style doesn’t make it the most effective way to lay out every page—especially one that contains a lot of images.By default, WordPress displays photos in a single vertical column. While that may seem ideal—especially if you can fit a large, high-resolution photo across the full width of your page—it means visitors have to do a lot of scrolling to get through all your photos.

There’s got to be a more efficient way to display them, right? Right.
The following tutorial will demonstrate how you can use WordPress galleries to create alternative layouts for photos using multiple rows and columns.
As we all know by now, the WordPress default isn’t always the best setting. That’s not to say that WordPress is incapable of laying photos out horizontally, it just takes more work than is necessary. You’d need to reduce the size of your photos, fix the wrap setting, and then place them side-by-side within your page… but that doesn’t always work out so well, especially in responsive design.
So, if you’re looking for a better way to lay out your site’s photos, let’s explore the two ways you can use galleries to do so.
Table of Contents
Option #1: The WordPress Core
Although WordPress’s default for photos is a vertical layout, WordPress does also offer a gallery solution. It’s just not something many people know to look for.
- Step 1: Upload all of your photos to your Media.
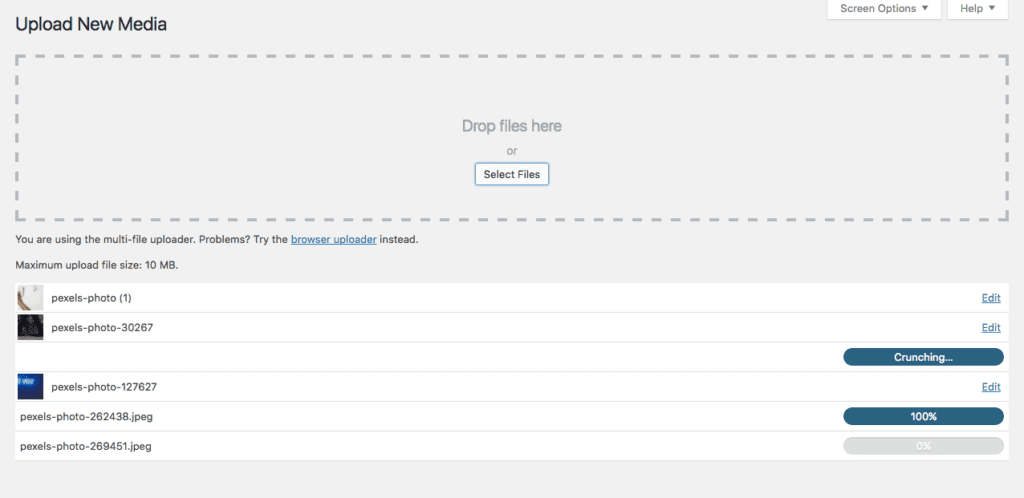
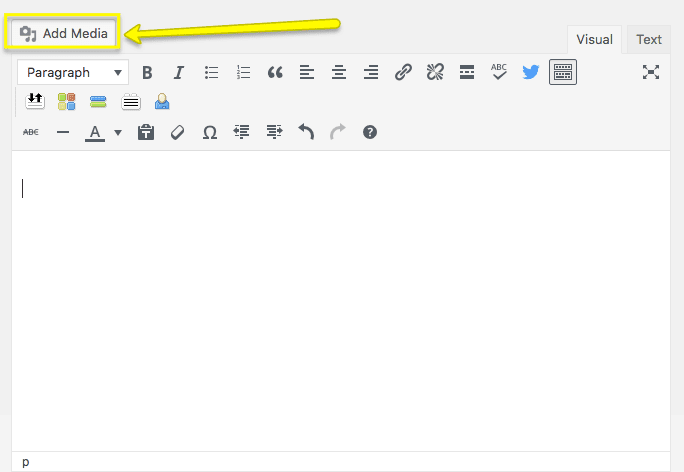
- Go to your post or page. Click on Add Media.
- Click the “Create Gallery” option on the left sidebar.
- Select all the images you want to display within your post or page.
- Hit “Create a new gallery” in the bottom-right of the prompt when you’re done.

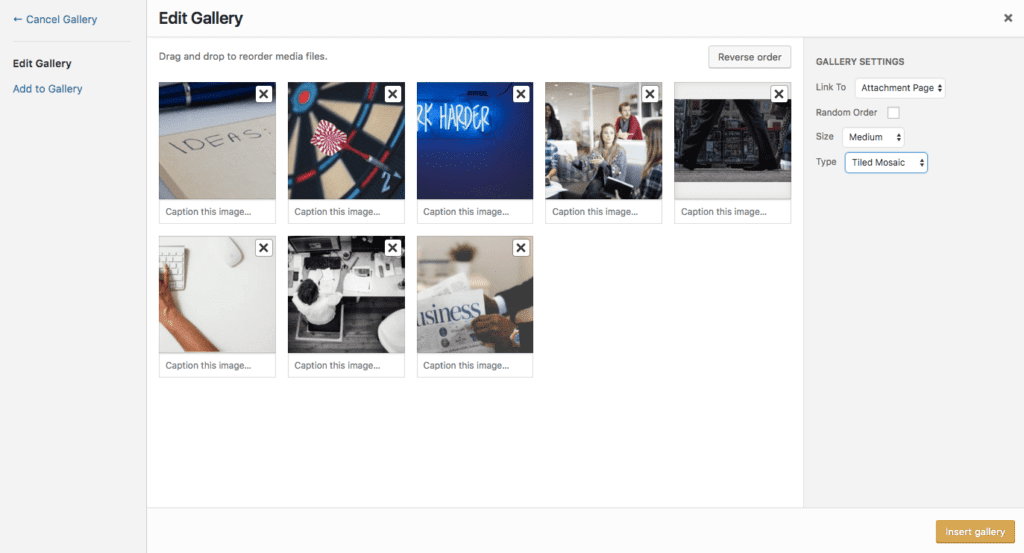
Step 4: You’ll then be taken to an Edit Gallery screen. From here, you can:
- Rearrange the order of your photos
- Select the size
- Add captions
- Embed a link within the gallery
- Choose a photo gallery layout
- When done applying your settings, click on “Finish gallery”.
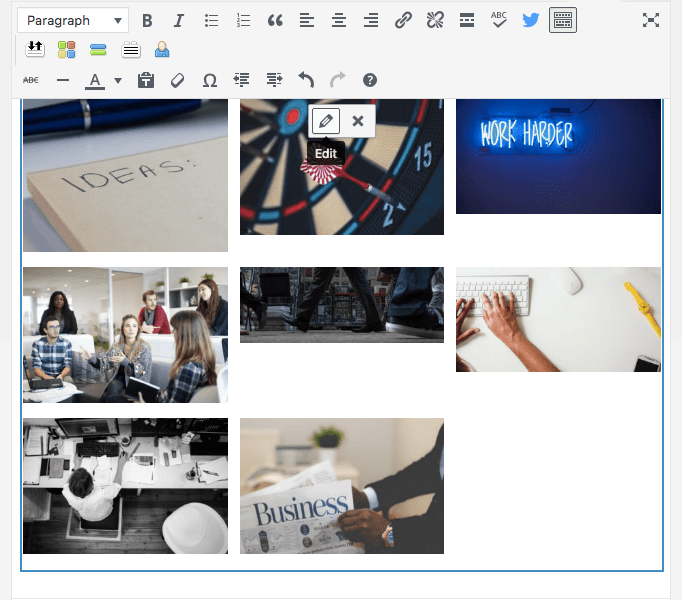
Step 5: Click the Preview button in the top-right corner of the screen to view how your new photo gallery will appear on-site.

Step 6: If you’re satisfied with the changes, publish your post or page once everything else is ready to go. If not, click on the new photo gallery box within the WYSIWYG, and use the pencil icon to make changes.
Option #2: The Plugin Solution for Galleries
While the WordPress gallery function is great, sometimes you may find it leaves you desiring more. Luckily enough, there’s a WordPress plugin for that. A whole lot of them, in fact.
One of the highest rated and most commonly downloaded free WordPress gallery plugins is Envira Gallery Lite. Feel free to use whichever one you prefer (I know JetPack has one, if you’ve already got that plugin running on your site). The steps will be pretty similar regardless of which one you use.
Step 1: Find the photo gallery plugin and install it.
Step 2: Find your new gallery plugin on your sidebar and open it up.
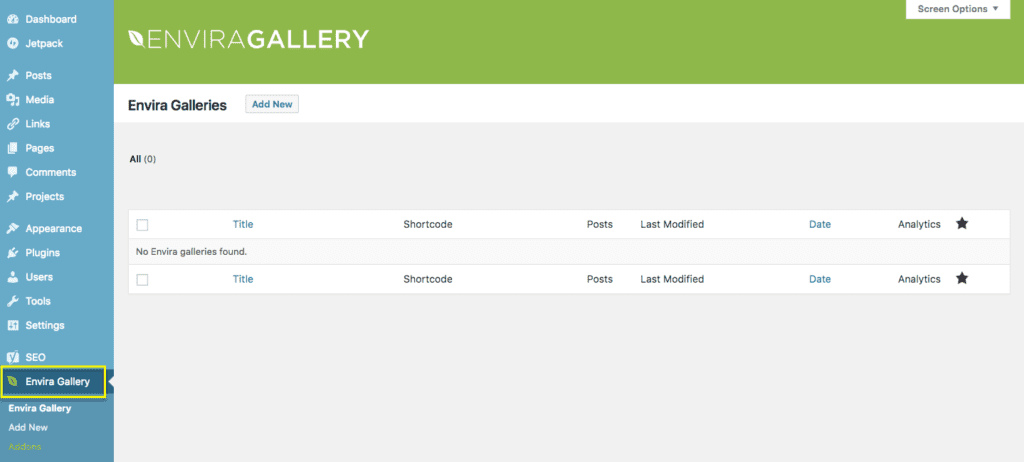
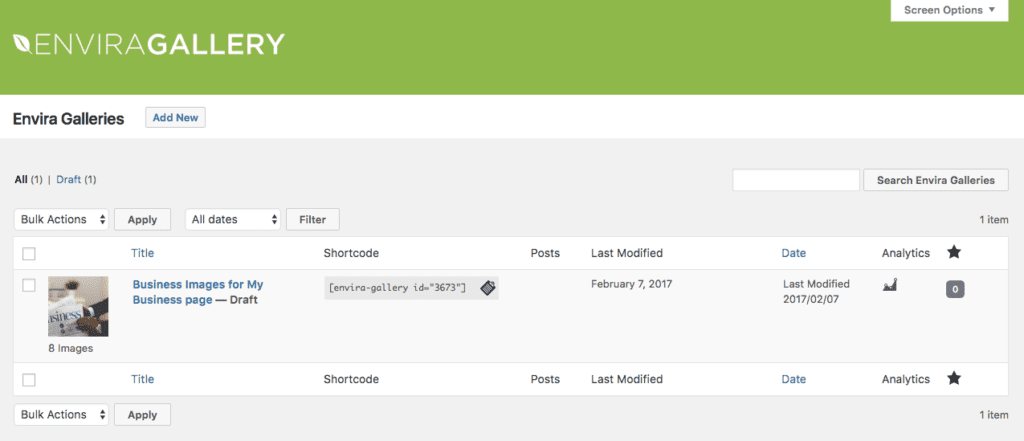
Step 3: Create your new photo gallery from within this tool. Within the Gallery plugin, this means clicking on “Add New”.
Step 4: Create a name for your photo gallery so you remember which collection of photos this is.
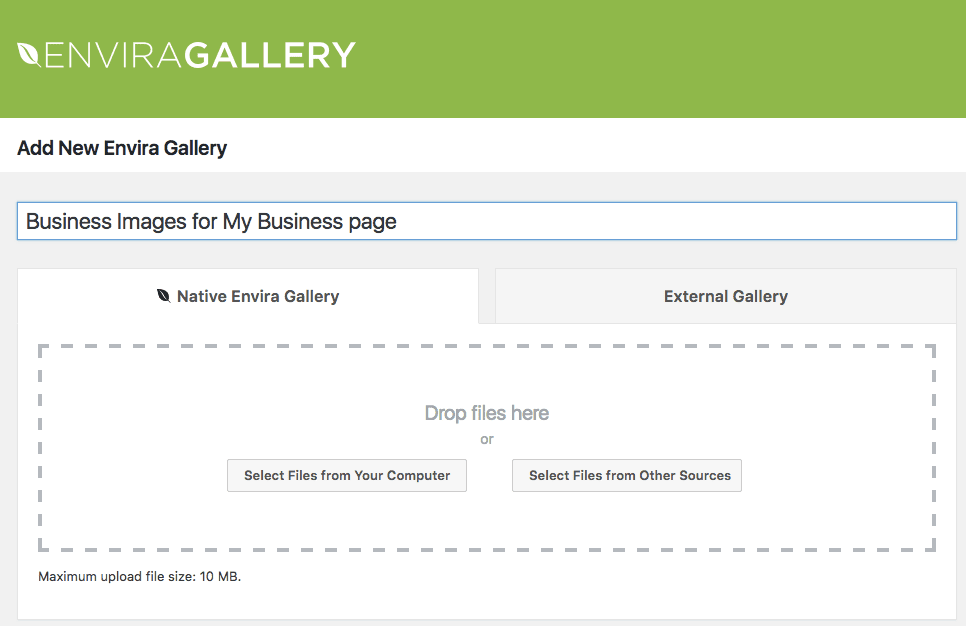
Step 5: With the Envira Gallery tool (and many of these plugins), you can select files from a number of sources.
- If you want to use photos stored on your computer, use “Select Files from Your Computer”.
- If you already uploaded your files to Media, use “Select Files from Other Sources”.
- If you want to use photos from Instagram, click on the External Gallery tab and upload them there. (This is only available to members who pay for the upgrade.)
- Then select images one by one and watch as they fill in the gallery below.
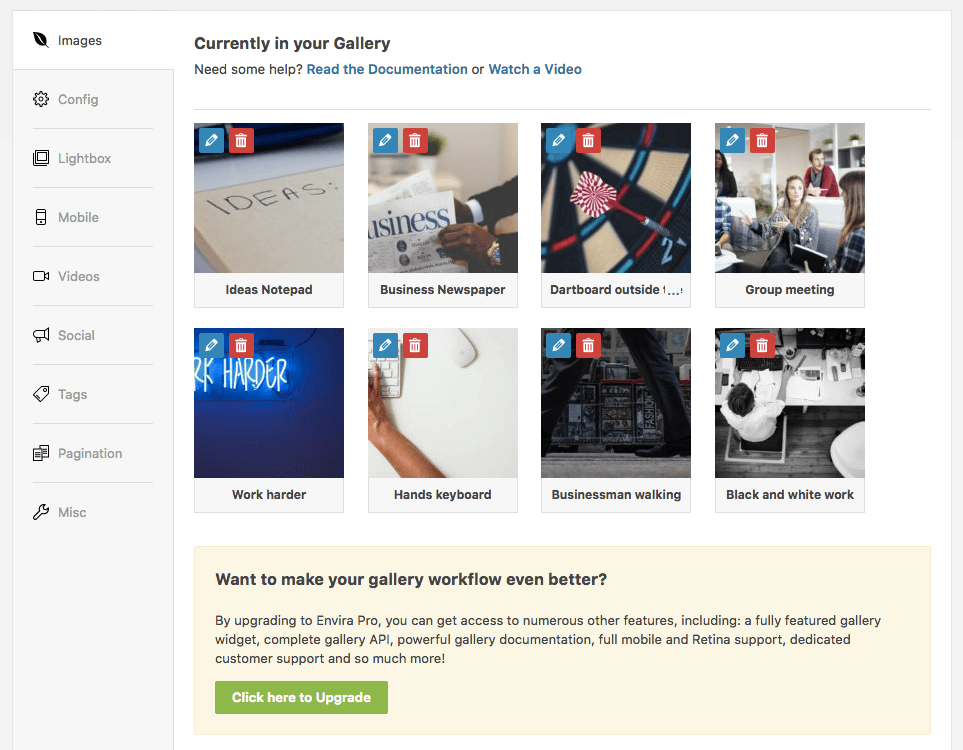
Step 6: Once you’ve selected all your images, you can then play around with the settings to refine your photo gallery.
- Click on the pencil icon for each image to rename or change the individual link. (Or trash them if you decide not to use them.)
- Drag and drop images so they’re placed in the order you want
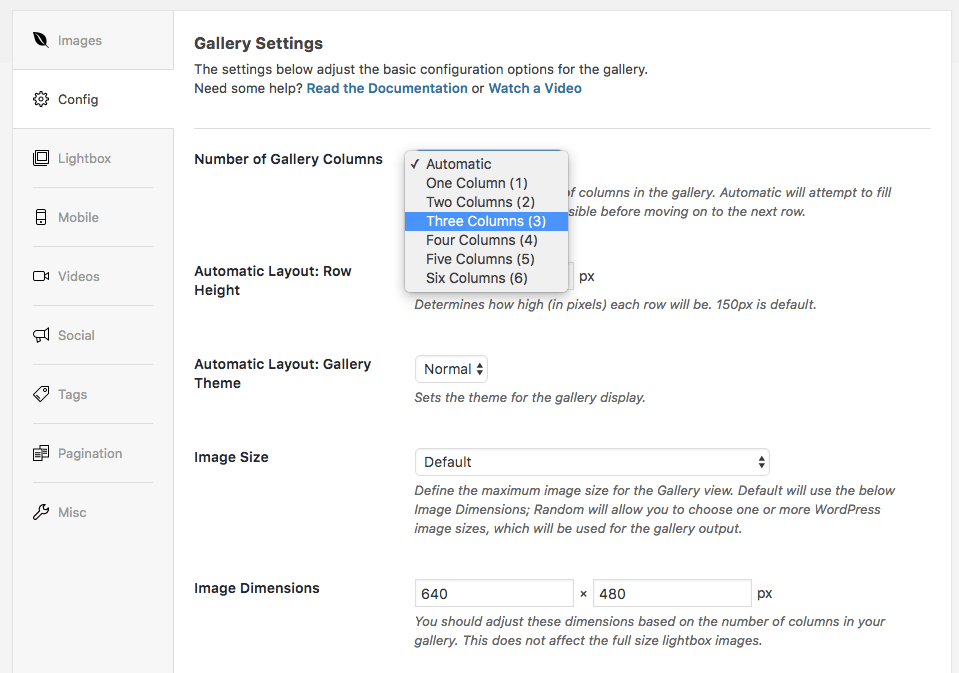
- Choose the number of columns
- Set a default row height, image size, etc
- Allow for resizing and cropping for responsive gallery presentation
- Enable the lightbox feature
- Create a name and slug for your gallery (if you want it to have its own page).
- When done, click on Save Draft.
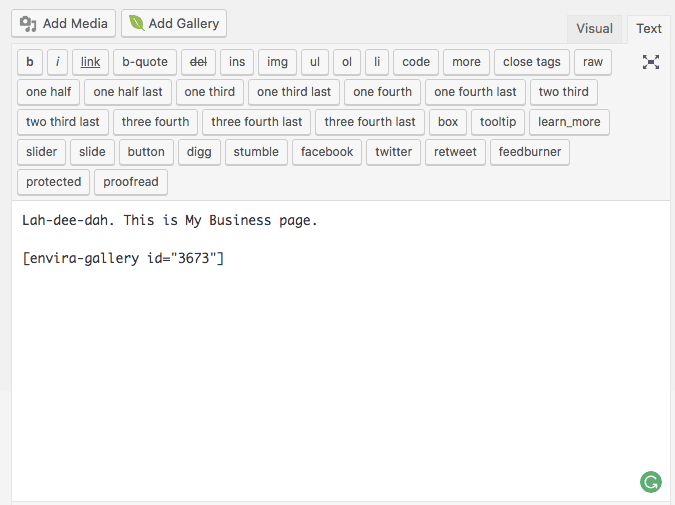
Step 7: After your gallery has been saved, you’ll see that a shortcode has been generated for it on the right sidebar.
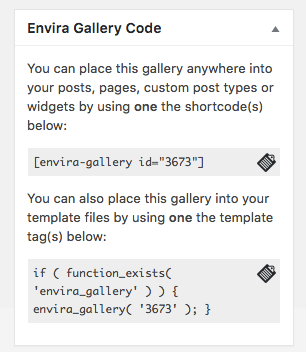
- Use this to embed within your post or page using the text editor.
Step 8: Click the Preview button in the top-right corner of the screen to view how your new photo gallery will appear on-site.

Step 9: If you’re satisfied with the changes, publish your post or page once everything else is ready to go. If not, go back into your new Envira photo gallery and edit it until satisfied.
Summary
And that’s it! If you’re tired of laying out streams of photos in one long, overdone column, then give the WordPress gallery a try. Just be sure that whatever tool you pick is responsive and will load your images quickly and without issue. You may have a new creative way to lay out your photos, but you still need to ensure of their high-quality delivery to your visitors.
Do you have any questions on this article? Have you had any problems working with media inside WordPress? Leave us your comments below.
PS. Don’t forget to optimize your images before putting a lot of them in a photo gallery.
Now that you have your audio files up-and-running, read this guide to audio gallery options.
