Activity Logs for Your WordPress Multisite Network
If you run a newspaper or magazine site, there may be a lot of activity with authors, editors, and also ordinary users. You may even have multiple sites to run.
It’s important for publishers to have an accurate way to track who is making changes on their sites. And it’s vital to know what has been changed. Here at PublishPress, we recommend Logtivity as an excellent way to monitor your site. Click here for a guide to Logtivity.
Table of Contents
How Logtivity Helps Multisite Users
Logtivity is a centralized platform for activity logs and alerts. They track everything that happens on the sites you maintain, and Logtivity also sends you alerts for important events! When you set up Logtivity to monitor your site, you can relax.
One of the major benefits of the Logtivity platform is that it can track all your WordPress sites from one dashboard. This applies to individual WordPress sites and also sites in a multisite network.
In this guide, I'll show you how to install Logtivity so that you can have an activity log for all the sites in your multisite network.
Using Logtivity as a Multisite Activity Log
After registering for a Logtivity account, follow these steps:
- Click the “Team Settings” link.
- Click the “Developers” menu link in the left sidebar.
- Copy the “Team API Key”. You can see this screenshot in the image below:

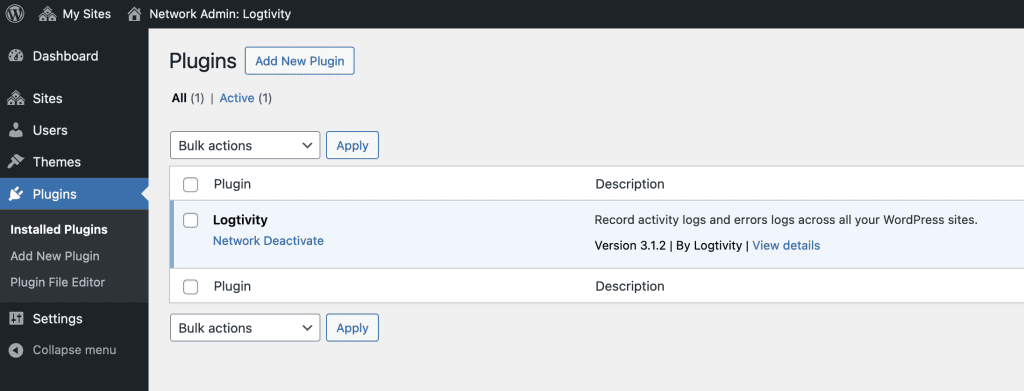
Next, we're going to install the official Logtivity plugin for your multisite network.
- Go to the main site in your multisite network.
- Click the “Plugins” link and then the “Add New” button.
- Search for the Logtivity plugin. Install and activate the plugin across your network, as in this screenshot below:
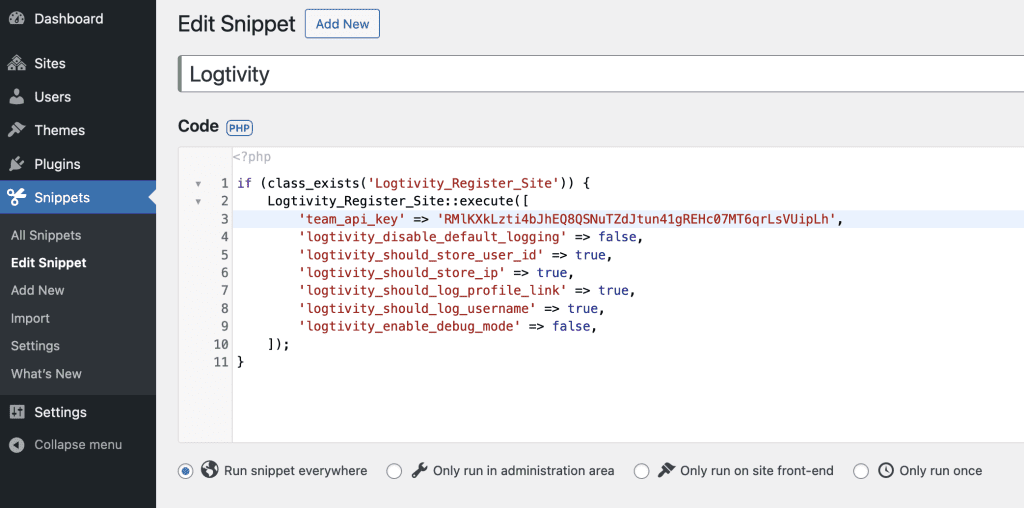
Finally, we'll need to use add some code to your sub-sites. This code sample below can be used in a variety of ways. For example, you can add it to your theme's functions.php file, or to a small custom plugin. You can also use the the “Code Snippets” plugin and other similar plugins, as we explain below. Just make sure to replace the third line with your Team API key:
if (class_exists('Logtivity_Register_Site')) {
	Logtivity_Register_Site::execute([
		'team_api_key' => 'ENTER_YOUR_TEAMS_API_KEY_HERE',
		'logtivity_disable_default_logging' => false,
		'logtivity_should_store_user_id' => true,
		'logtivity_should_store_ip' => true,
		'logtivity_should_log_profile_link' => true,
		'logtivity_should_log_username' => true,
		'logtivity_enable_debug_mode' => false,
	]);
}
Here are the steps to add this code to all your sites without doing any actual coding.
- Install the Code Snippets plugin.
- Go to “Snippets” and click the “Functions” tab.
- Click “Add New”, and insert your code as in the screenshot below.
- Check the box “Allow this snippet to be activated on individual sites on the network”.
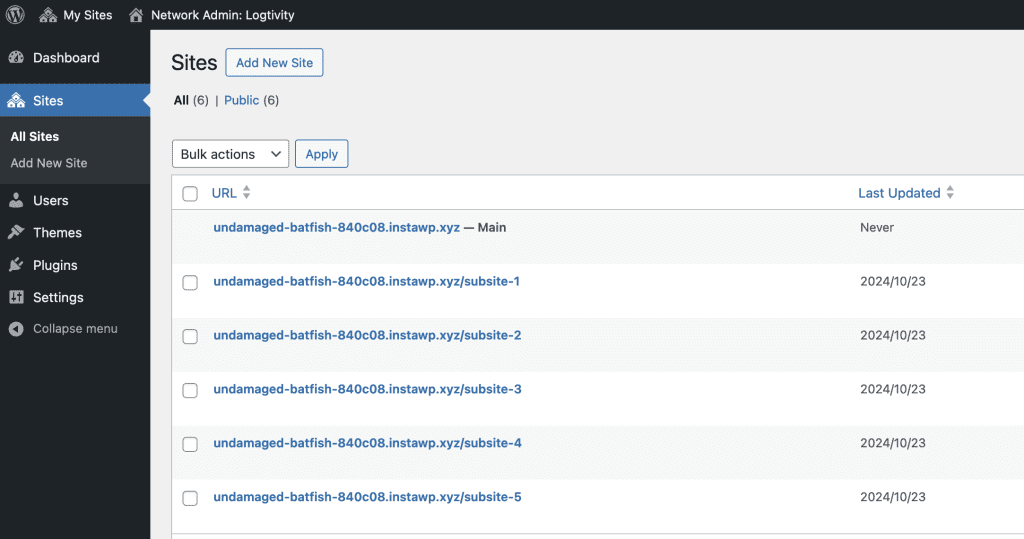
With the three steps outlined above, you should be ready to use Logtivity across all the sites in your network. Each site will automatically appear in the Logtivity dashboard the first time someone visits it. The screenshot below displays the six sites included in the multisite network used for this tutorial.
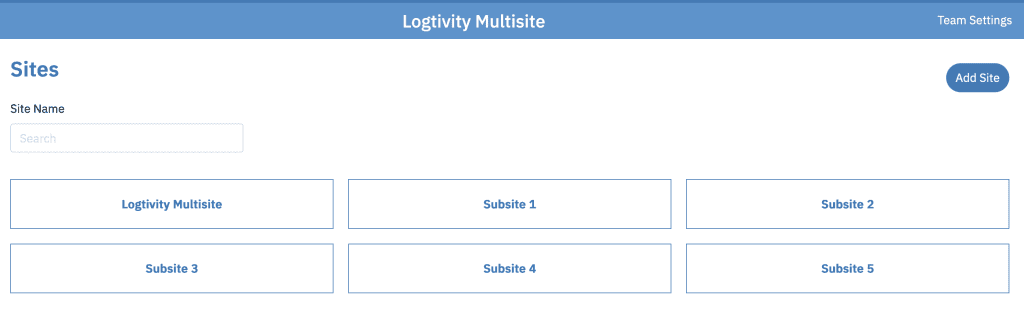
This final screenshot shows all those sites on the Logtivity dashboard. To add these sites, and any future sites in this network, I just had to follow the steps in this tutorial.