
PublishPress Future Has New Triggers, Steps and Post Meta Options
The PublishPress Future plugin allows you to schedule changes to posts, pages and other content types. With this plugin you can create automatic actions to unpublish, delete, trash, move a post to a new status and more.
We're also working on exciting new option called “Action Workflows” where you can update your content using custom workflows with multiple steps and schedules.
Here some examples of what you can do with PublishPress Future:
- 1 year after a post is published, send an email to the author asking them to check the content.
- Change the status to “Draft” after 15 days.
- Add new categories to post after 6 months.
- 15 days after the post is published, move the post to the “Pending Review” status and add a new category.
Version 4.3 of PublishPress Future is available today and it brings many new features and improvements. There are new triggers, new triggers, and new post meta integrations.
Table of Contents
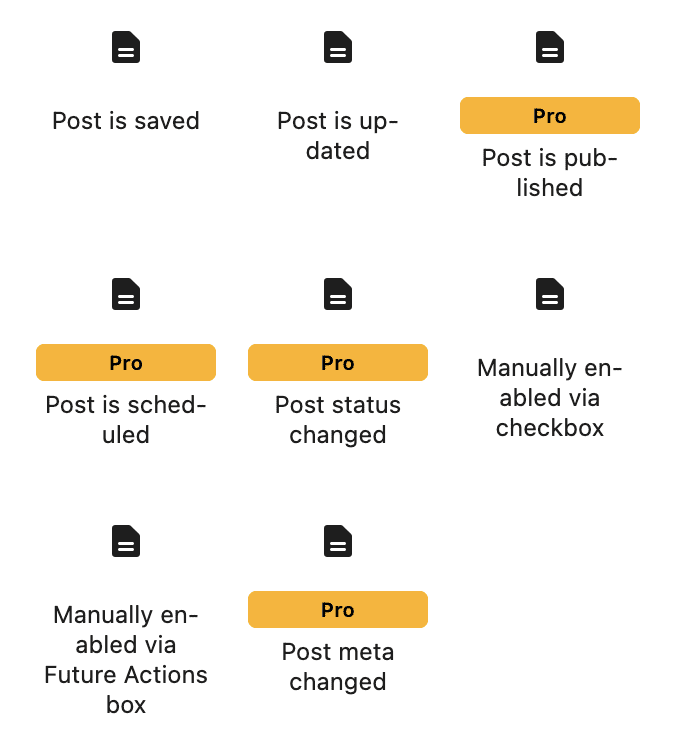
4 New Triggers
Triggers are used to start each workflow. So with these four new triggers, you can start the workflow in many new ways. Click here to see a list of all the triggers.
- Post is published (Pro version): This trigger activates when an existing post is published.
- Post is scheduled (Pro version): This trigger activates when a post is scheduled.
- Post status changed (Pro version): This trigger activates when a post status changes.
- Post meta changed (Pro version): This trigger activates when a post meta field is changed
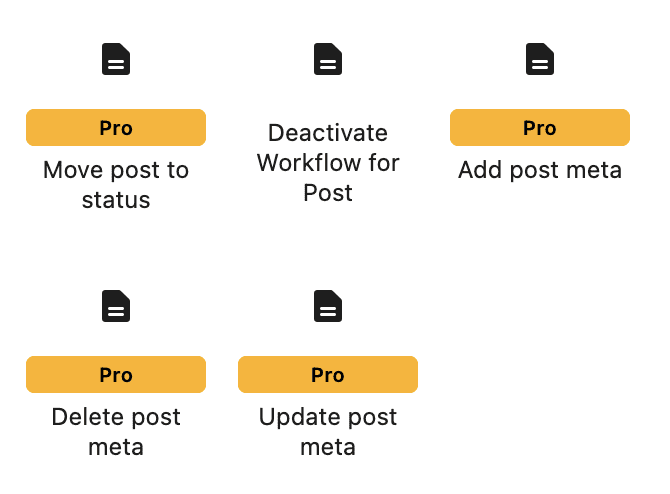
New Actions
Actions are available once a workflow has started to run. Click here to see a list of all the triggers.
- Add post meta (Pro version): This step adds post meta to a post.
- Delete post meta (Pro version): This step deletes post meta from a post.
- Update post meta (Pro version): This step updates post meta for a post.
Using Post Meta in PublishPress Future Steps
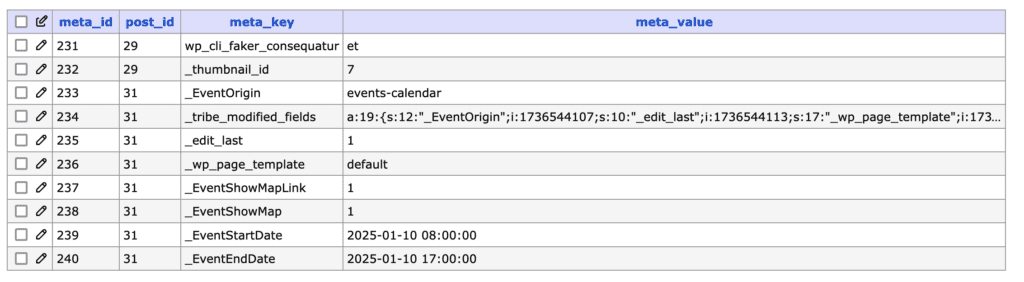
This guide will explain how post meta can be used in four steps: “Post meta changed”, “Add post meta”, “Delete post meta”, “Update post meta”. All four of these steps accept post meta. The field to enter the data in each step is labelled “Meta Keys”, as shown in this screenshot.

The data to enter in this field exists in the _postmeta field of your database, and in the meta_key column. This screenshot below shows the _postmeta table on a site with “The Events Calendar” plugin installed. For example, you can use the _EventStartDate column to create workflows based on the start date of events.
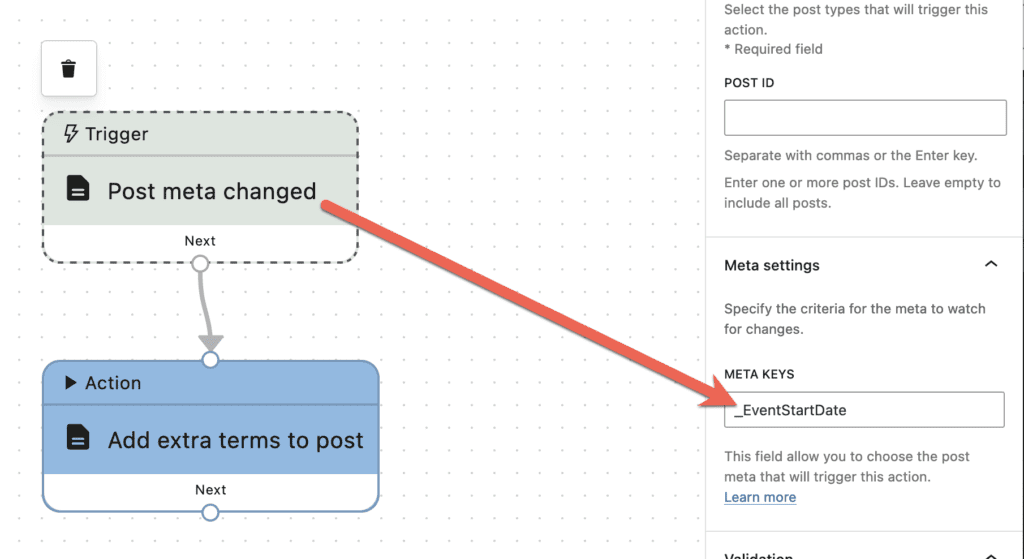
In the next screenshot, this workflow has the “Post meta changed” trigger. This trigger will activate when there are changes to the _EventStartDate column for an event.
This next screenshot shows another possible workflow. In this example, the trigger is “Post is updated”. The next step is “Add post meta” and again the _EventStartDate field is used. There is another field called “Meta Value” that allows you to choose which data is added to that post meta field.

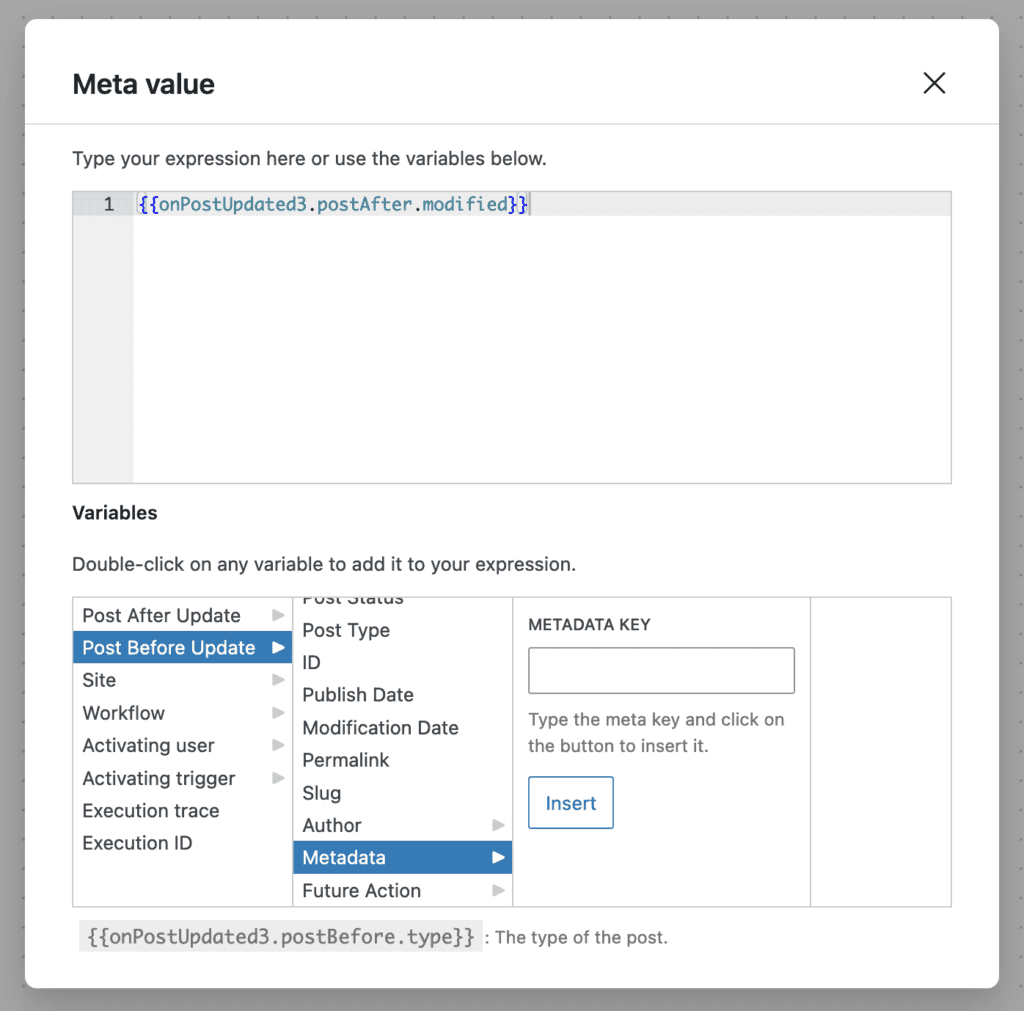
The “Meta Value” field allows you to choose from a wide range of data sources, including other post meta field. This screenshot below shows that you can use another post meta field to automatically update the _EventStartDate field.
Advanced Uses of Post Meta
There are also some more ways to use post meta inside PublishPress Future.
- Conditional Split (Pro version): This step allows you to continue a workflow only if certain conditions are met. For example, the workflow can continue only if certain post meta exists. It is not required to have both a True and a False option. More details.
- Schedule: This step enables actions to be scheduled. You can choose when to run the next step. The date used for the schedule can be a “Custom date source” which allows you to choose a date stores in post meta. More details.

The Best Plugin to Schedule Changes to Your WordPress Content
The PublishPress Future plugin allows you to schedule automatic changes to posts. You can update your content using custom workflows involving multiple steps.
