
How to Schedule a Term to be Added to a WordPress Post
We had a question from a PublishPress user this week. They wanted to publish a post and then automatically change the taxonomy term in the future. They wanted to automatically move a post into an “Archives” category three months after publication.
This is possible with the PublishPress Future plugin. You can schedule a Tag, Category or other type of term to be added to a post in the future. In WordPress, categories and tags are both examples of taxonomy terms. PublishPress Future can schedule changes for any taxonomy supported by your site. So this feature can work with custom taxonomies created by plugins such as WooCommerce, LearnDash, or custom development projects.
In this guide, I’ll show you two different ways to schedule a term change.
Table of Contents
Why Schedule Terms Changes on a Post?
Here’s are some common use-cases for this feature:
- Move old content into an Archive category.
- Add a “Featured” tag during a promotion and remove it later.
- Automatically categorize seasonal content after an event ends.
- Move product announcements into a “Legacy Products” category after a launch cycle.
- Add a “Needs Review” category after a specified period.
Video Guide to Scheduling a Term Change
#1. Schedule a Term Change With Future Actions
The first option is to use the “Future Actions” feature. This is ideal for individually scheduling changes for different posts. In this screenshot below, you can see the “Enable Future Action” option. This is in the “Quick Edit” area for each post.
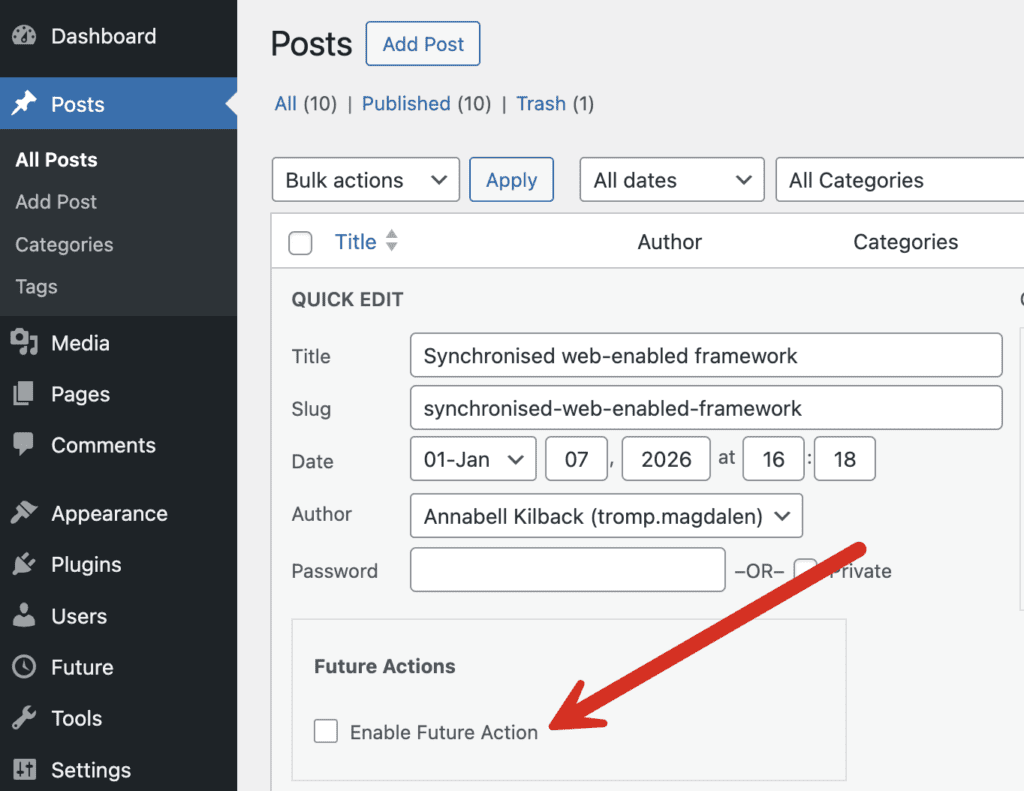
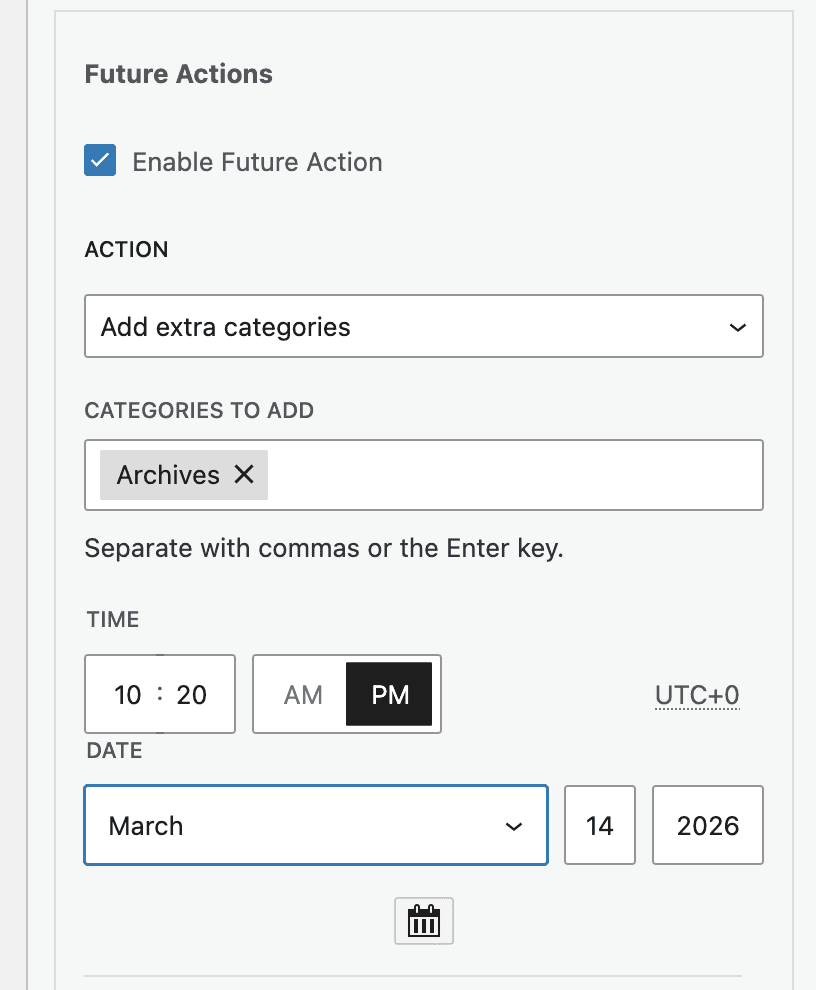
Inside this box, you can choose from several settings. Here are the ones I recommend for this guide:
- Action: Add extra categories
- Categories to add: Archives
- Time and Date: Choose when you want the term to be added to this post.
Once you make this change, you’ll see the schedule action under the “Future Action” column, as in this next screenshot:

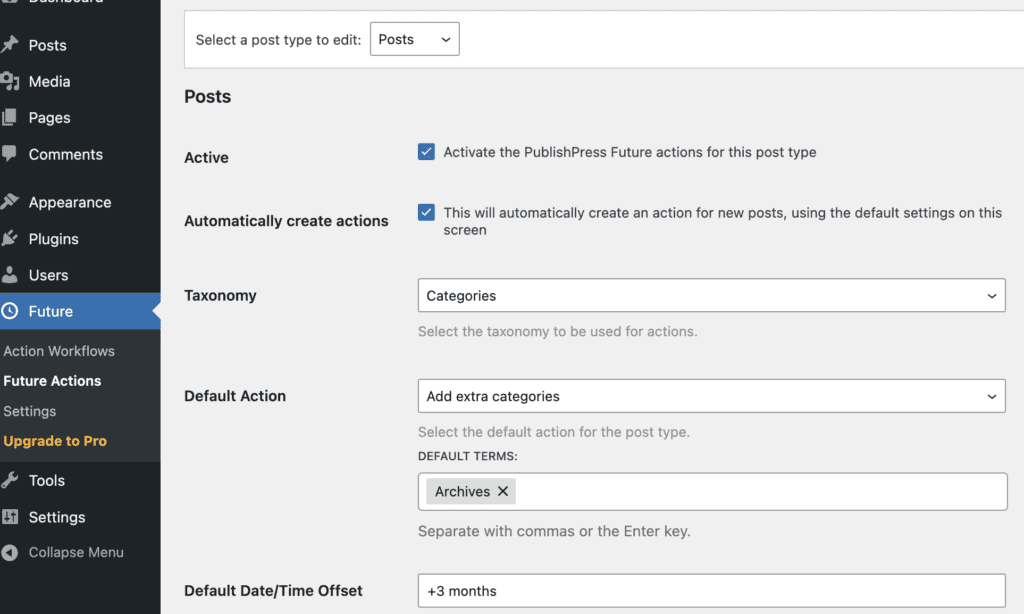
It’s also possible to set this up to happen automatically for all posts. Go to the “Future Actions” area of the plugin, and you can enable the box, “Automatically create actions”. Once this is enabled, all new posts will be created with this action automatically set up to run in three months.
#2. Schedule a Term Change With Action Workflows
The second option is to use the “Action Workflows” feature. This is ideal for bulk scheduling changes for many posts and also allows you to create more sophisticated workflow. For example, you can set up this process with Action Workflows:
- Waits 90 days after publication.
- Adds the “Archives” category.
- Sends an email to the content team.
- Creates a review task for the author.
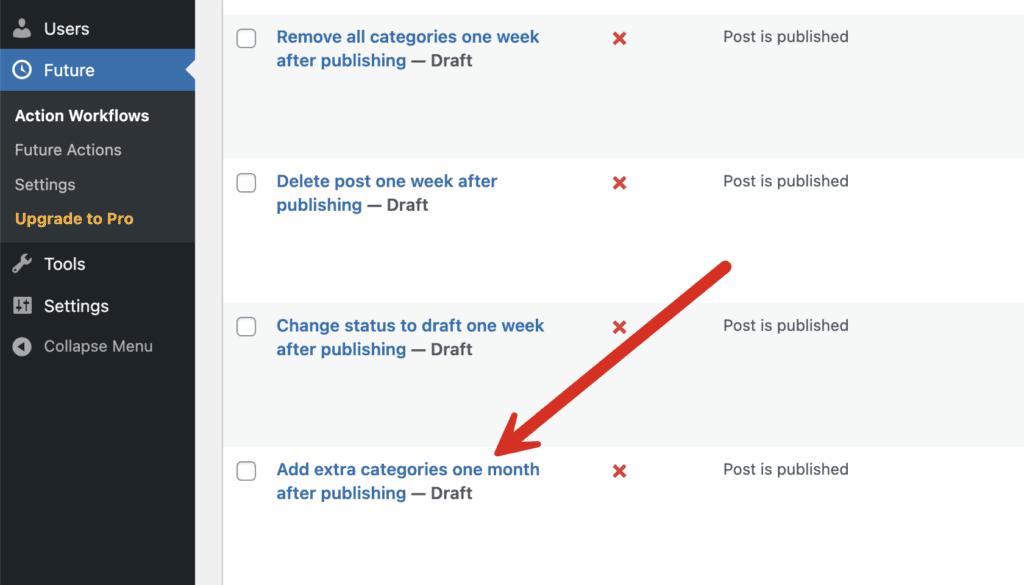
Go to the “Action Workflows” area of the plugin and you’ll see a sample workflow that is perfect for what we need. Click on “Add extra categories one month after publishing” as in this screenshot below.
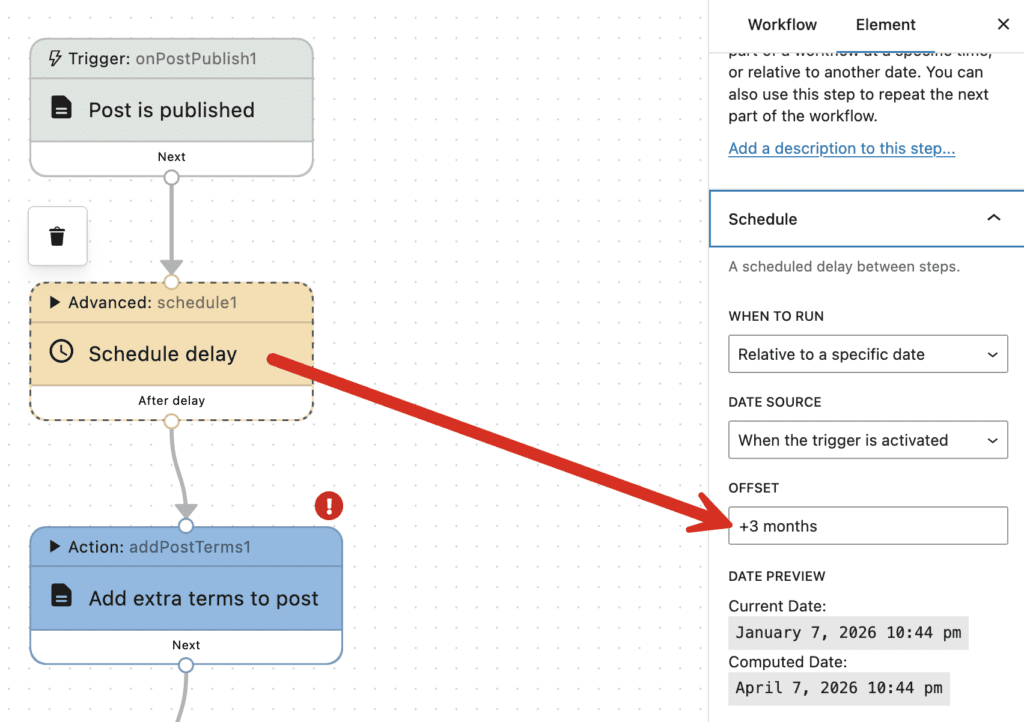
The first thing we’ll need to update is the “Schedule delay” step. Click on that step, and in the right sidebar you can choose how long the delay will be after the post is published. In this screenshot below, you can see that we’ve set the delay to be three months.
With the Action Workflows feature, you can also get more advanced and use a custom date to trigger the next step. Under the “Date Source” option, you can add other dates sources for the scheduling.
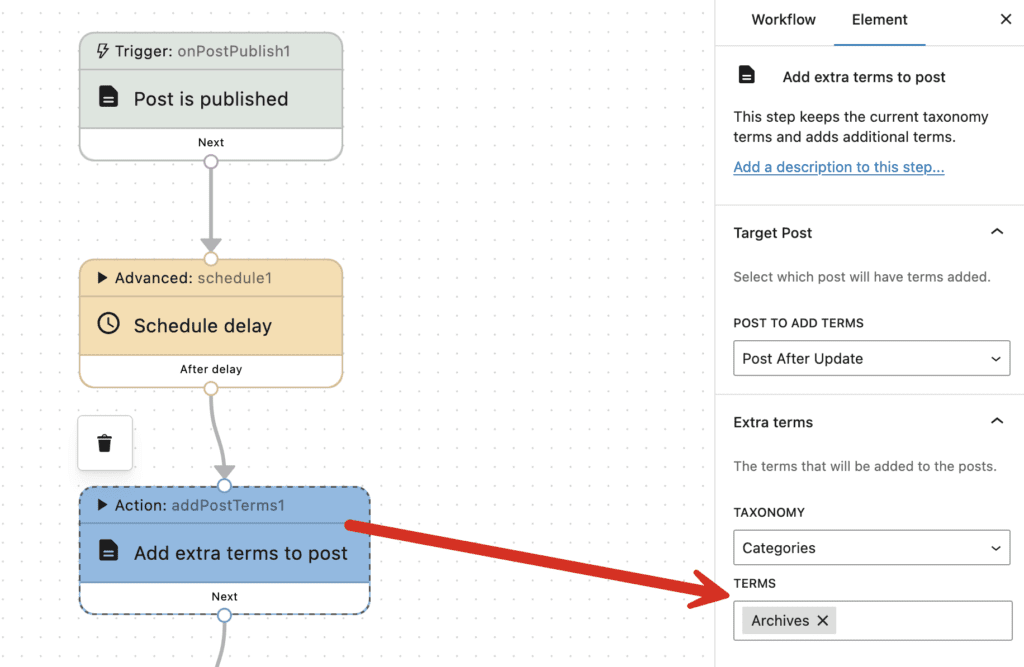
Next, click on “Add extra terms to post”, and you can choose which terms will be added to the posts. In this screenshot below, I’ve chosen the “Archives” term.
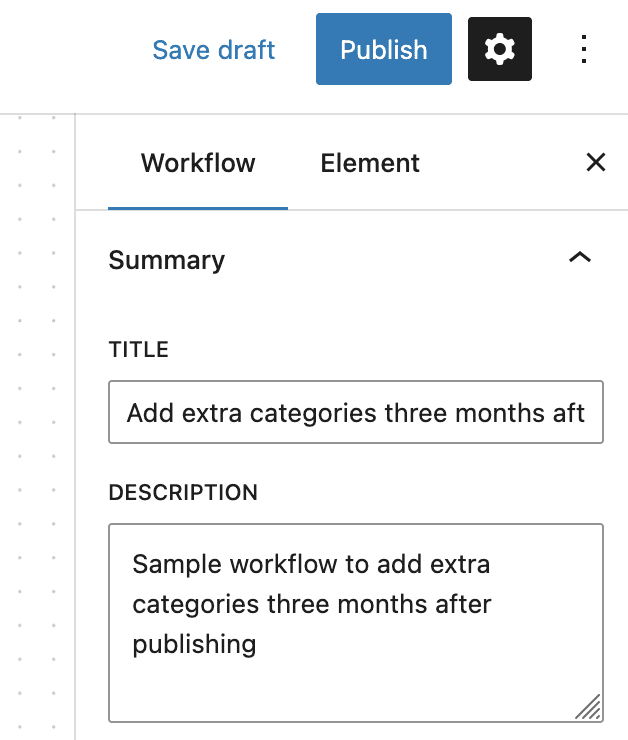
To complete the process, you may want to update the name of this workflow and then click the “Publish” button to finish this process.
Now that you have this workflow set up, it will run automatically whenever a new post is published. The advantage of Action Workflows is that they allow multiple steps, conditional logic, notifications, and reusable automation across many posts. You can do things such as send an email every time the workflow runs.
Using Future Actions or Future Workflows?
Here’s the difference between the two approaches explained in this guide:
| Feature | Future Actions | Action Workflows |
|---|---|---|
| One-off changes | ✅ | ✅ |
| Bulk automation | ❌ | ✅ |
| Multiple steps | ❌ | ✅ |
| Email notifications | Limited | ✅ |
| Reusable across posts | ❌ | ✅ |
| Conditional logic | ❌ | ✅ |
Do More with PublishPress Future
Scheduling taxonomy changes is just one way to automate content management in WordPress. You can also use PublishPress Future to automatically add categories or tags after a delay, move content to Draft status with Action Workflows, or make broader updates with the Update Post action. If you’re new to workflows, the Introduction to Action Workflows explains how the workflow builder works. For advanced setups, PublishPress Future can also integrate with Advanced Custom Fields and imports.

The Best Plugin to Schedule Changes to Your WordPress Content
The PublishPress Future plugin allows you to schedule automatic changes to posts. You can update your content using custom workflows involving multiple steps.
